

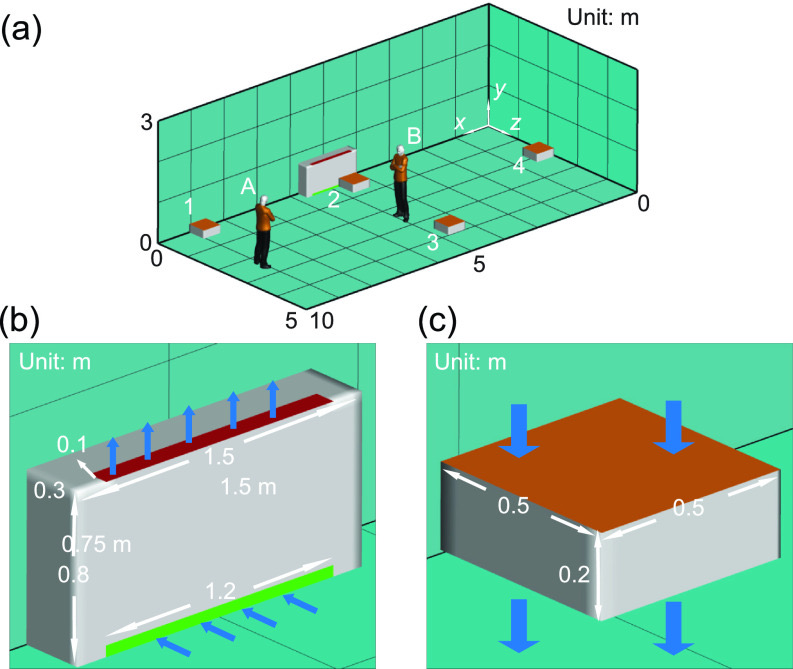
Over the last two Sunday afternoons I’ve been working on a little project building air purifiers for some friends classrooms based on the design tested in this paper:
https://pubmed.ncbi.nlm.nih.gov/34040337/
The basic idea of using an HVAC filter attached to a box fan has been around for a long time, but what got me interested in building one was the simulations and results generated by this paper. The key take-always for me were:
-
Placement, orientation and speed matter
-
Additional filter media doesn’t matter
-
The device reduces exposure enough to make a difference
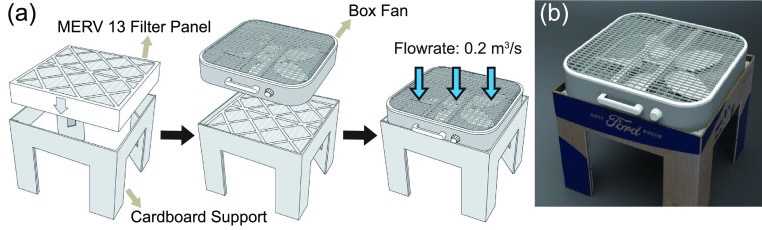
I shared this paper and one of our friends who is an elementary teacher asked where to get one of these purifiers. The paper refers to a cardboard frame made by Ford, but Jamie brought-up a few additional parameters that need to be considered for this application (the durability and safety of the cardboard design are questionable in an elementary classroom setting).
I considered a number of materials to replace the cardboard but settled on a simple wooden frame for a number of reasons. The wood frame is strong enough without being heavy or bulky, it is inexpensive and it can be built with readily-available tools. It’s also flexible in that differences in parts and materials can be compensated for fairly easily (this was tested during the prototyping phase). Finally the safety aspects of untreated pine are fairly well-known and manageable.
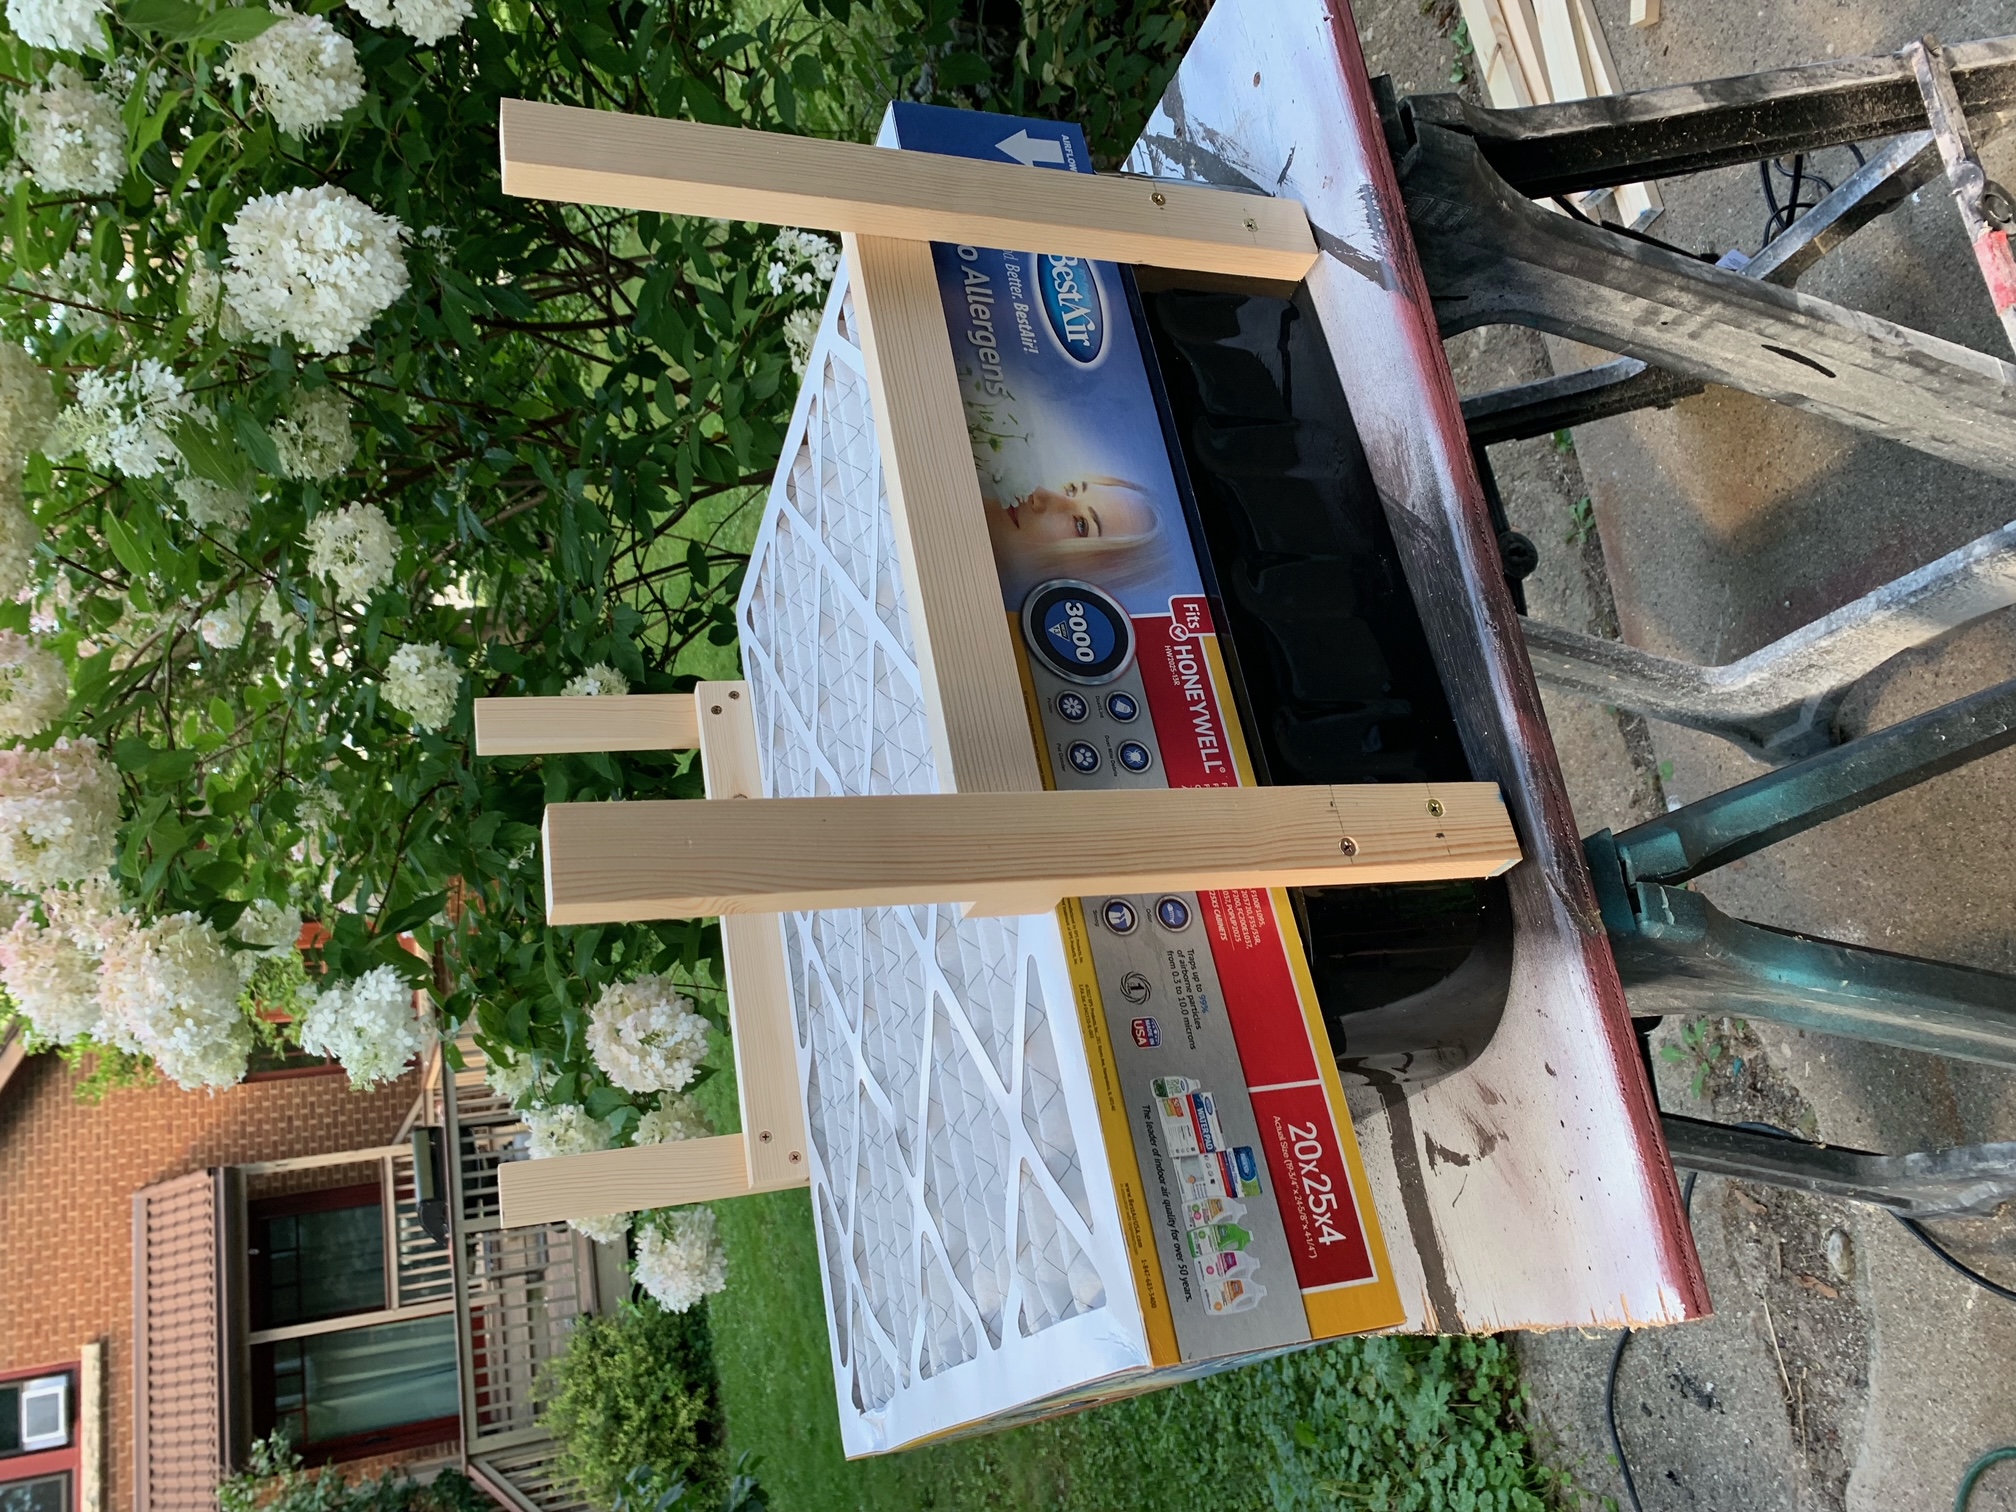
The initial prototype was constructed entirely out of materials that could be sourced locally for the purpose of speed. This meant deviating from the initial sketch as a 20x20x4 MERV-13 filter could not be found so a 20x25x4 filter was used instead.
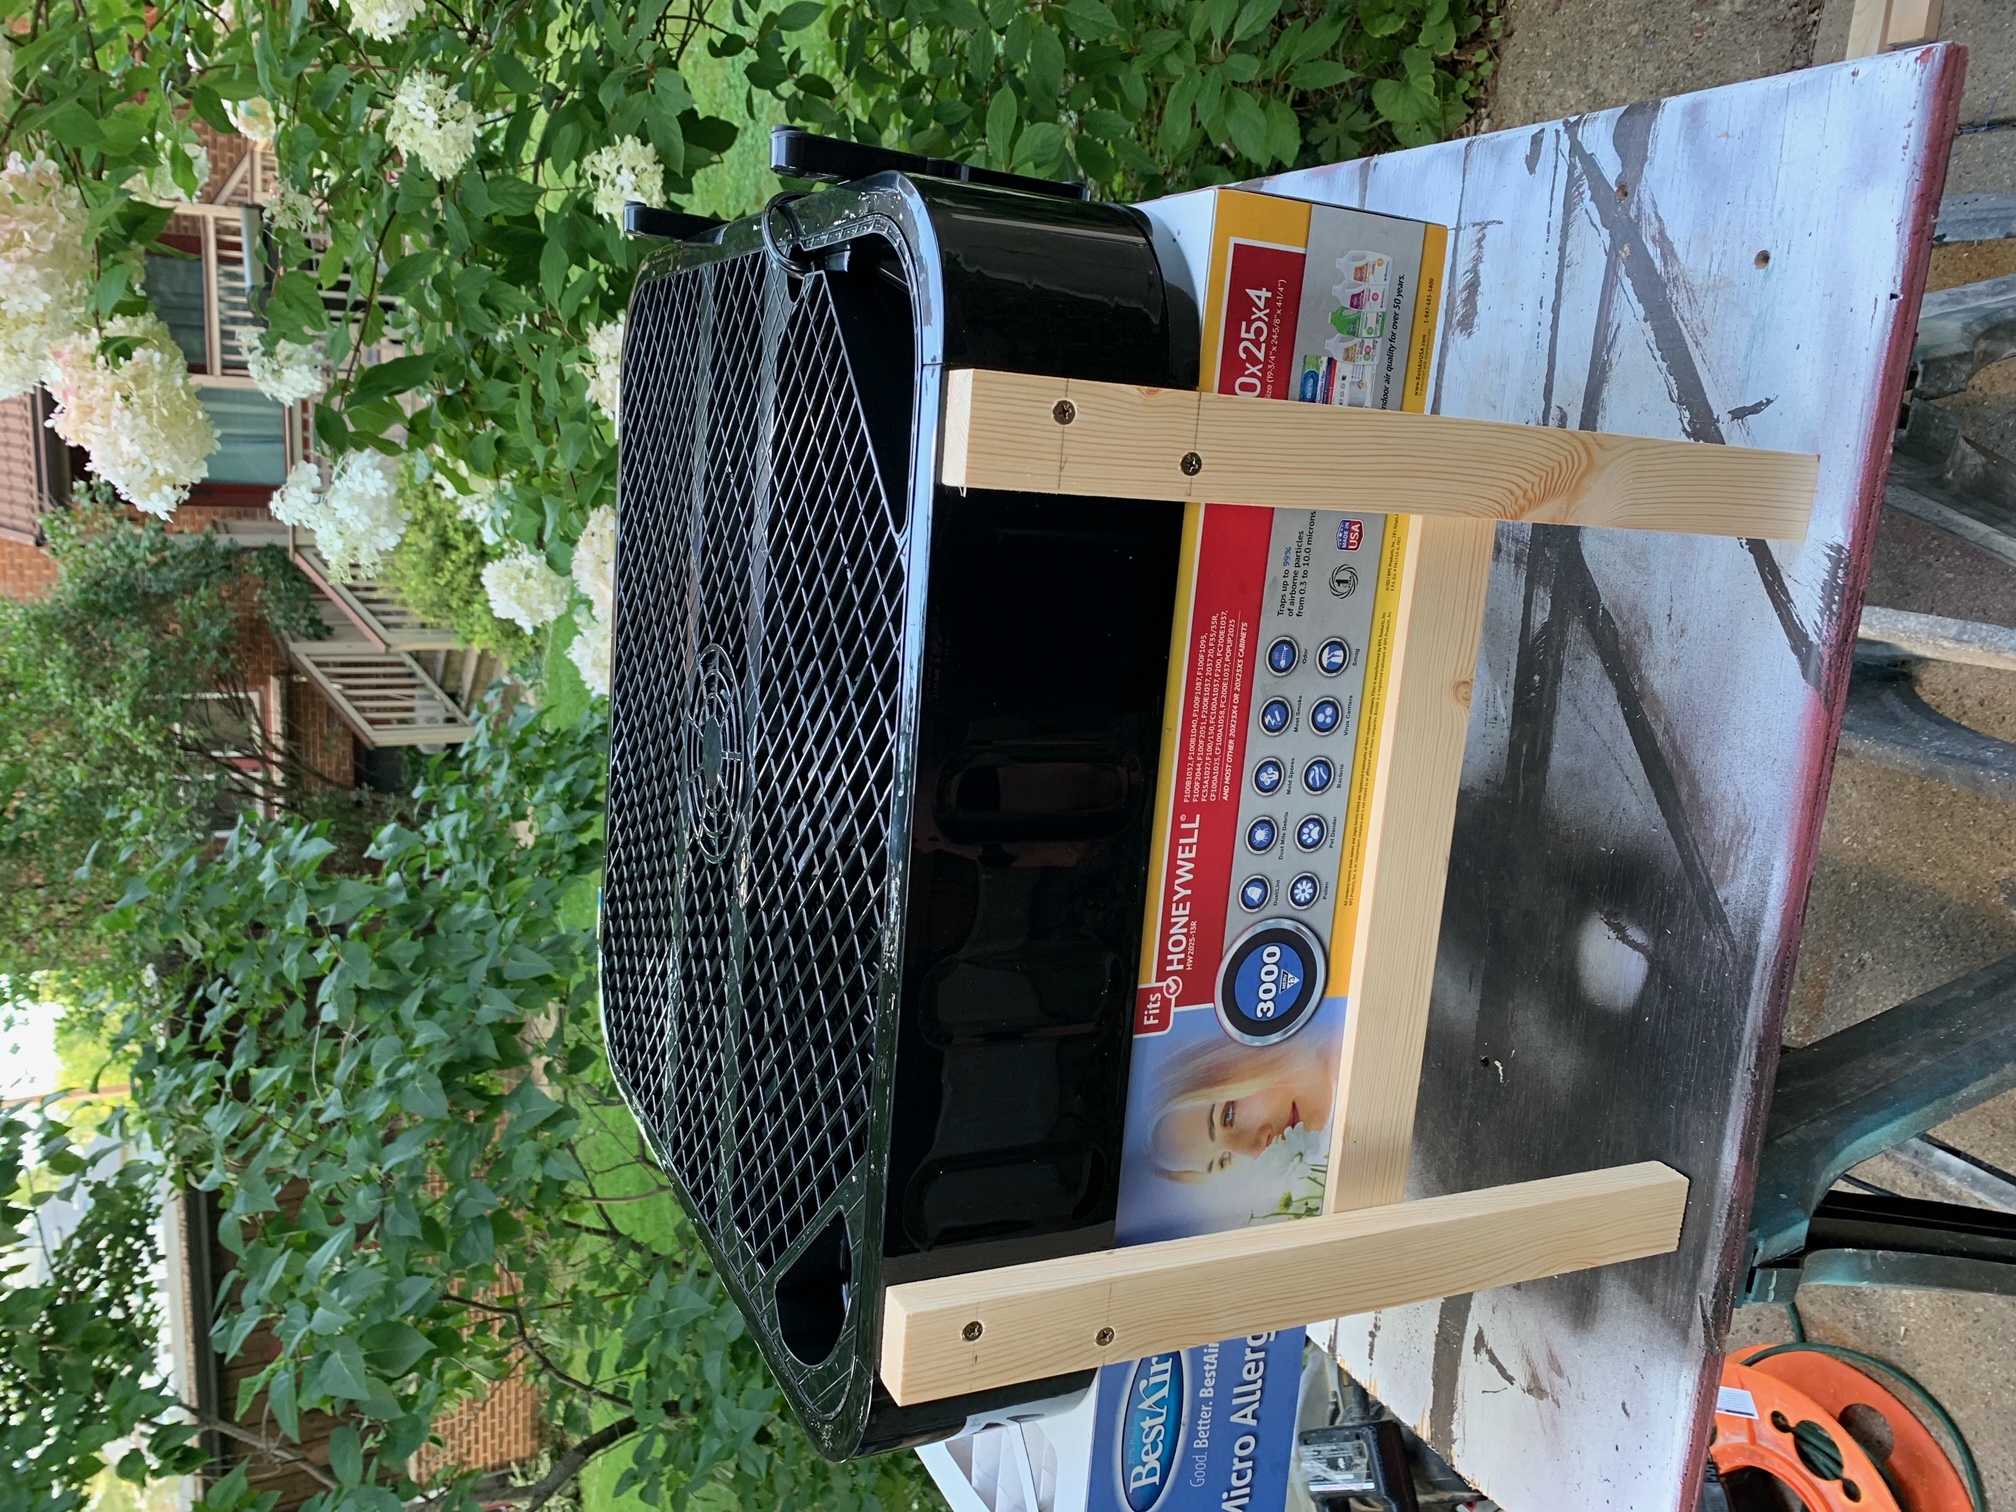
After the filter, the fan is the most expensive component of the purifier. Almost any 20” box fan will work, and I considered looking for used fans to keep the cost down, but I was able to find a suitable new fan for less than $15. Not only was this fan inexpensive, it turned out to have a number of advantages.
The fan is almost entirely made out of plastic. Not only is this lighter than the steel-cased fans I was expecting but it also makes it very easy to attach the frame using the same fasteners used to construct the frame itself.
The controls for the fan are located on the face (as opposed to the edge). During operation, the speed control is obscured by the filter element preventing it from being changed (the speed is simply set to “high” and the knob removed).
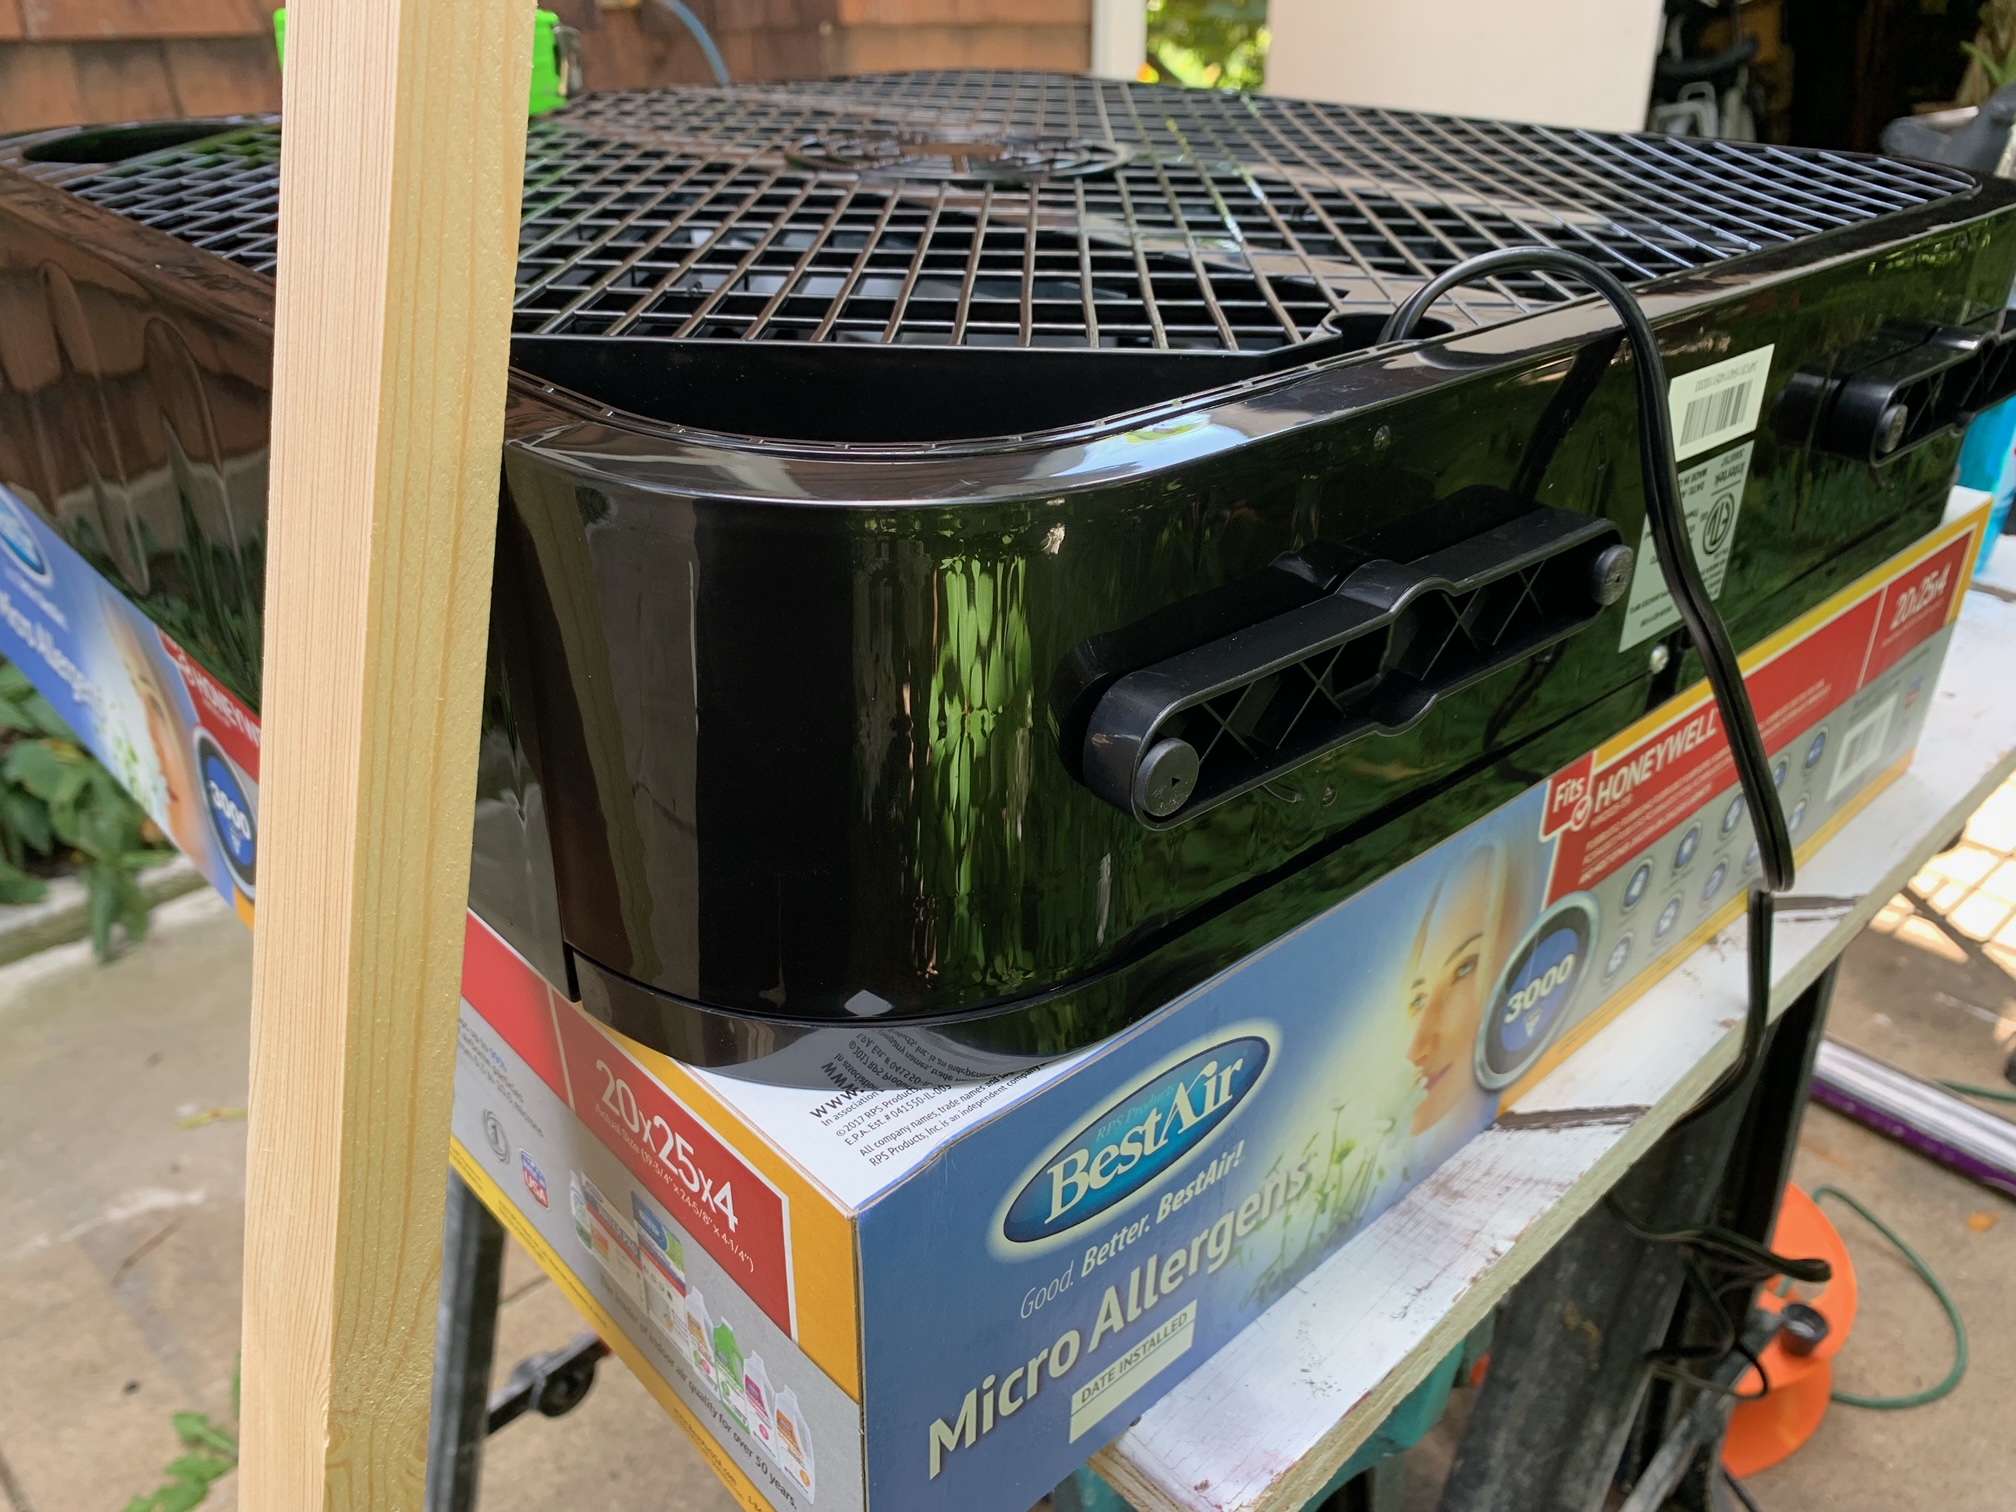
Finally, this fan has “retractable” stabilizing feed which when deployed serve to provide a back-stop for the filter element. They could alternatively be used as a locking mechanism for the filter (by adding an additional frame member) but during testing friction appeared sufficient to keep the filter in place and I left this out to reduce part count.
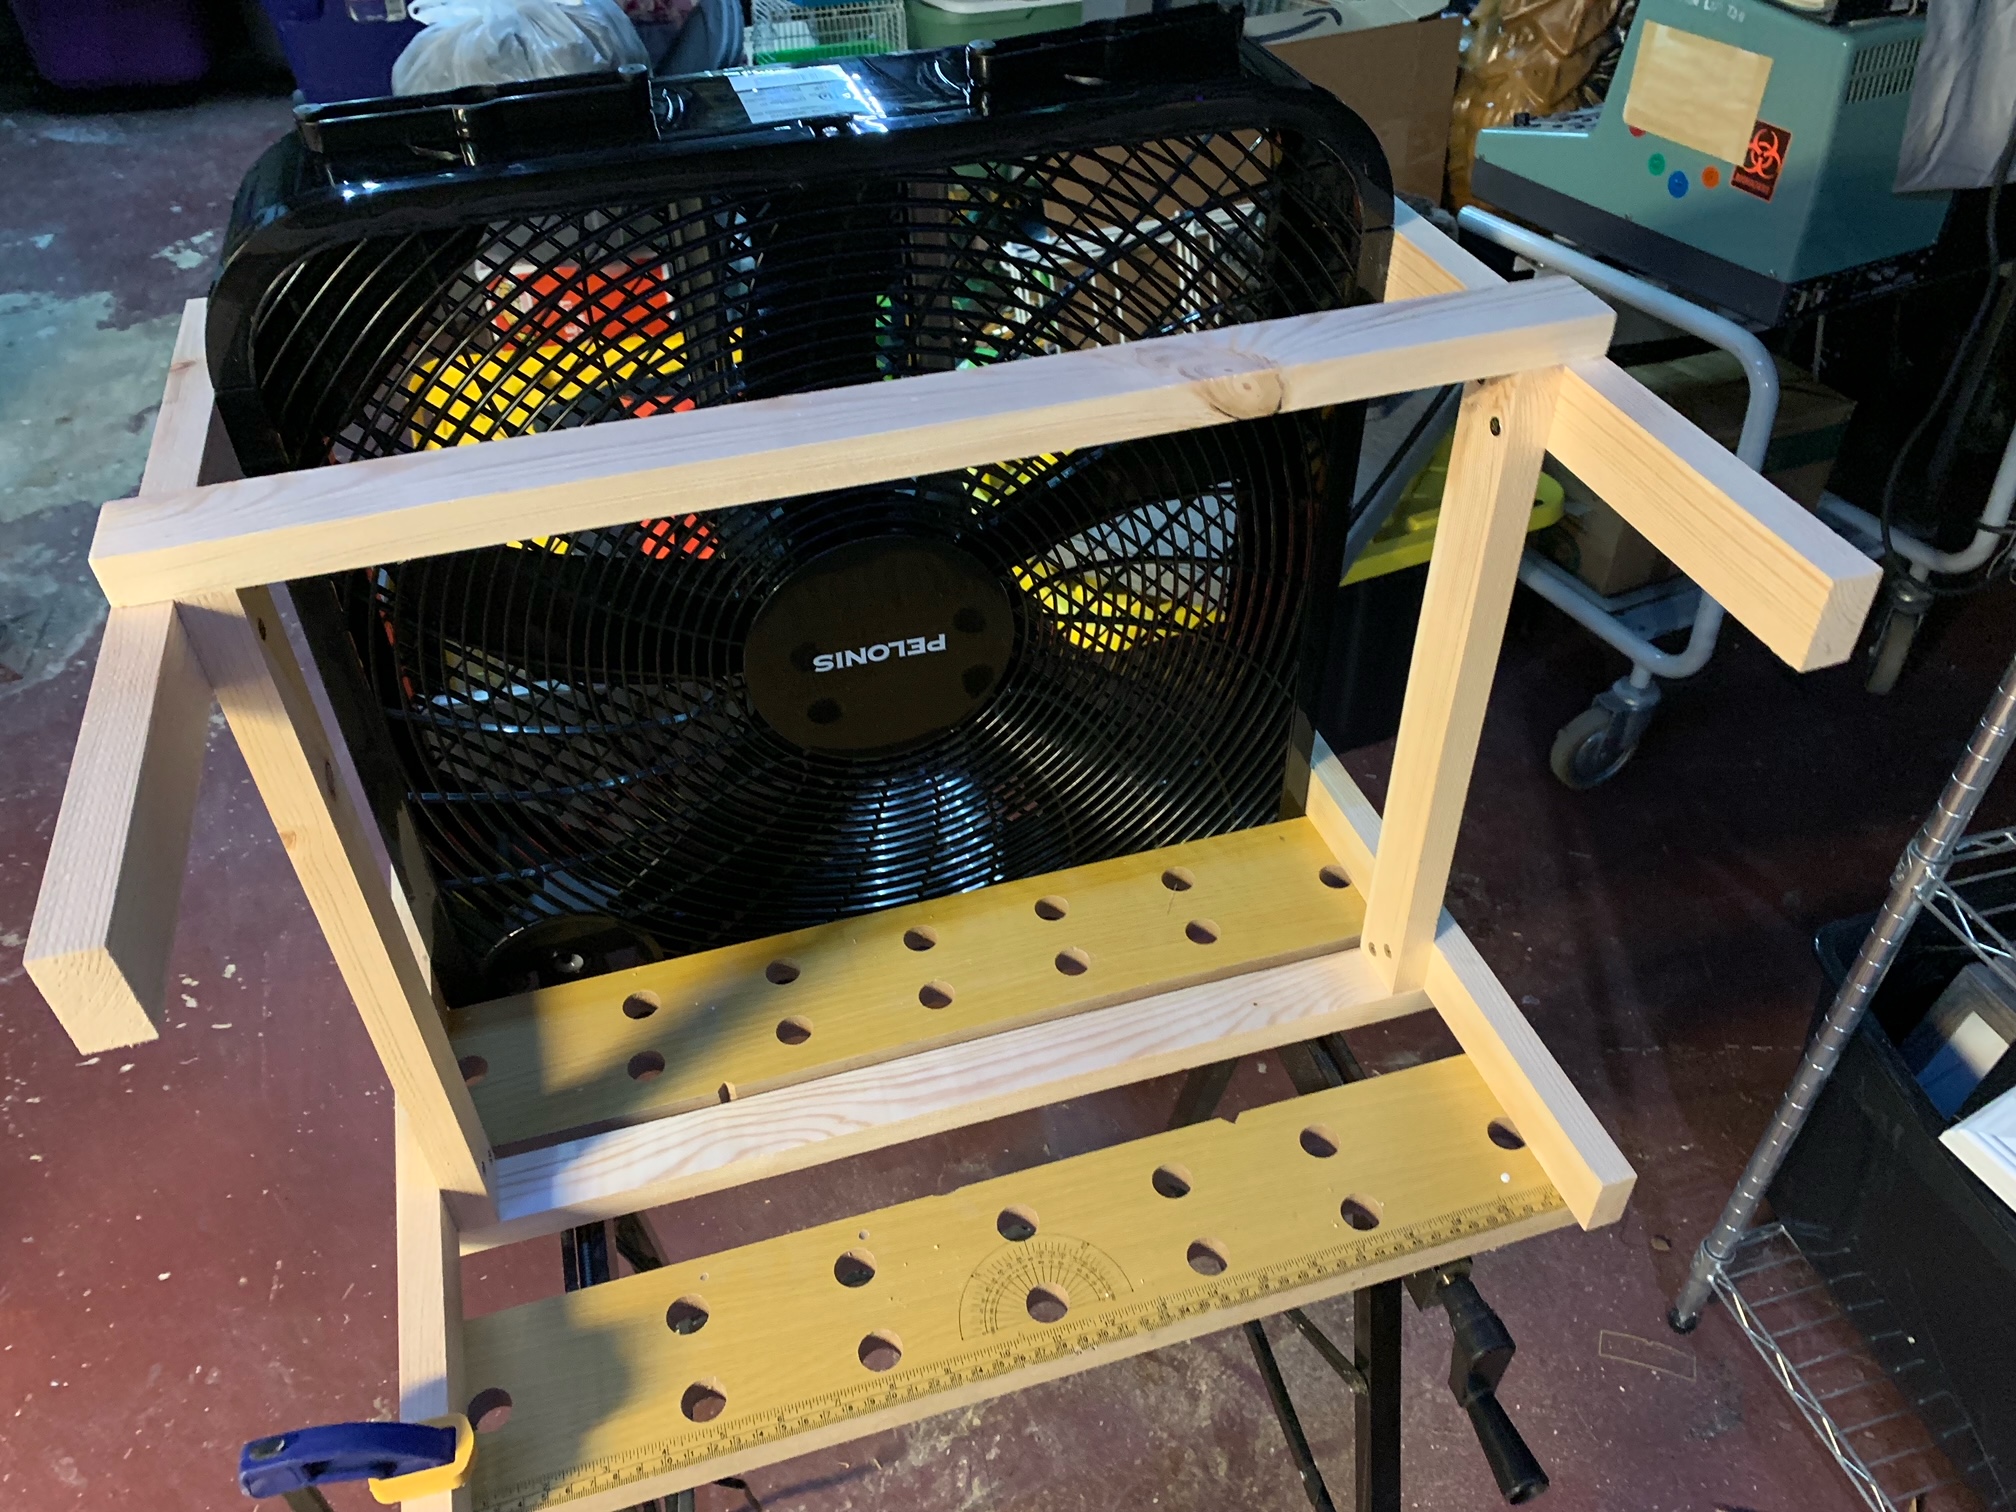
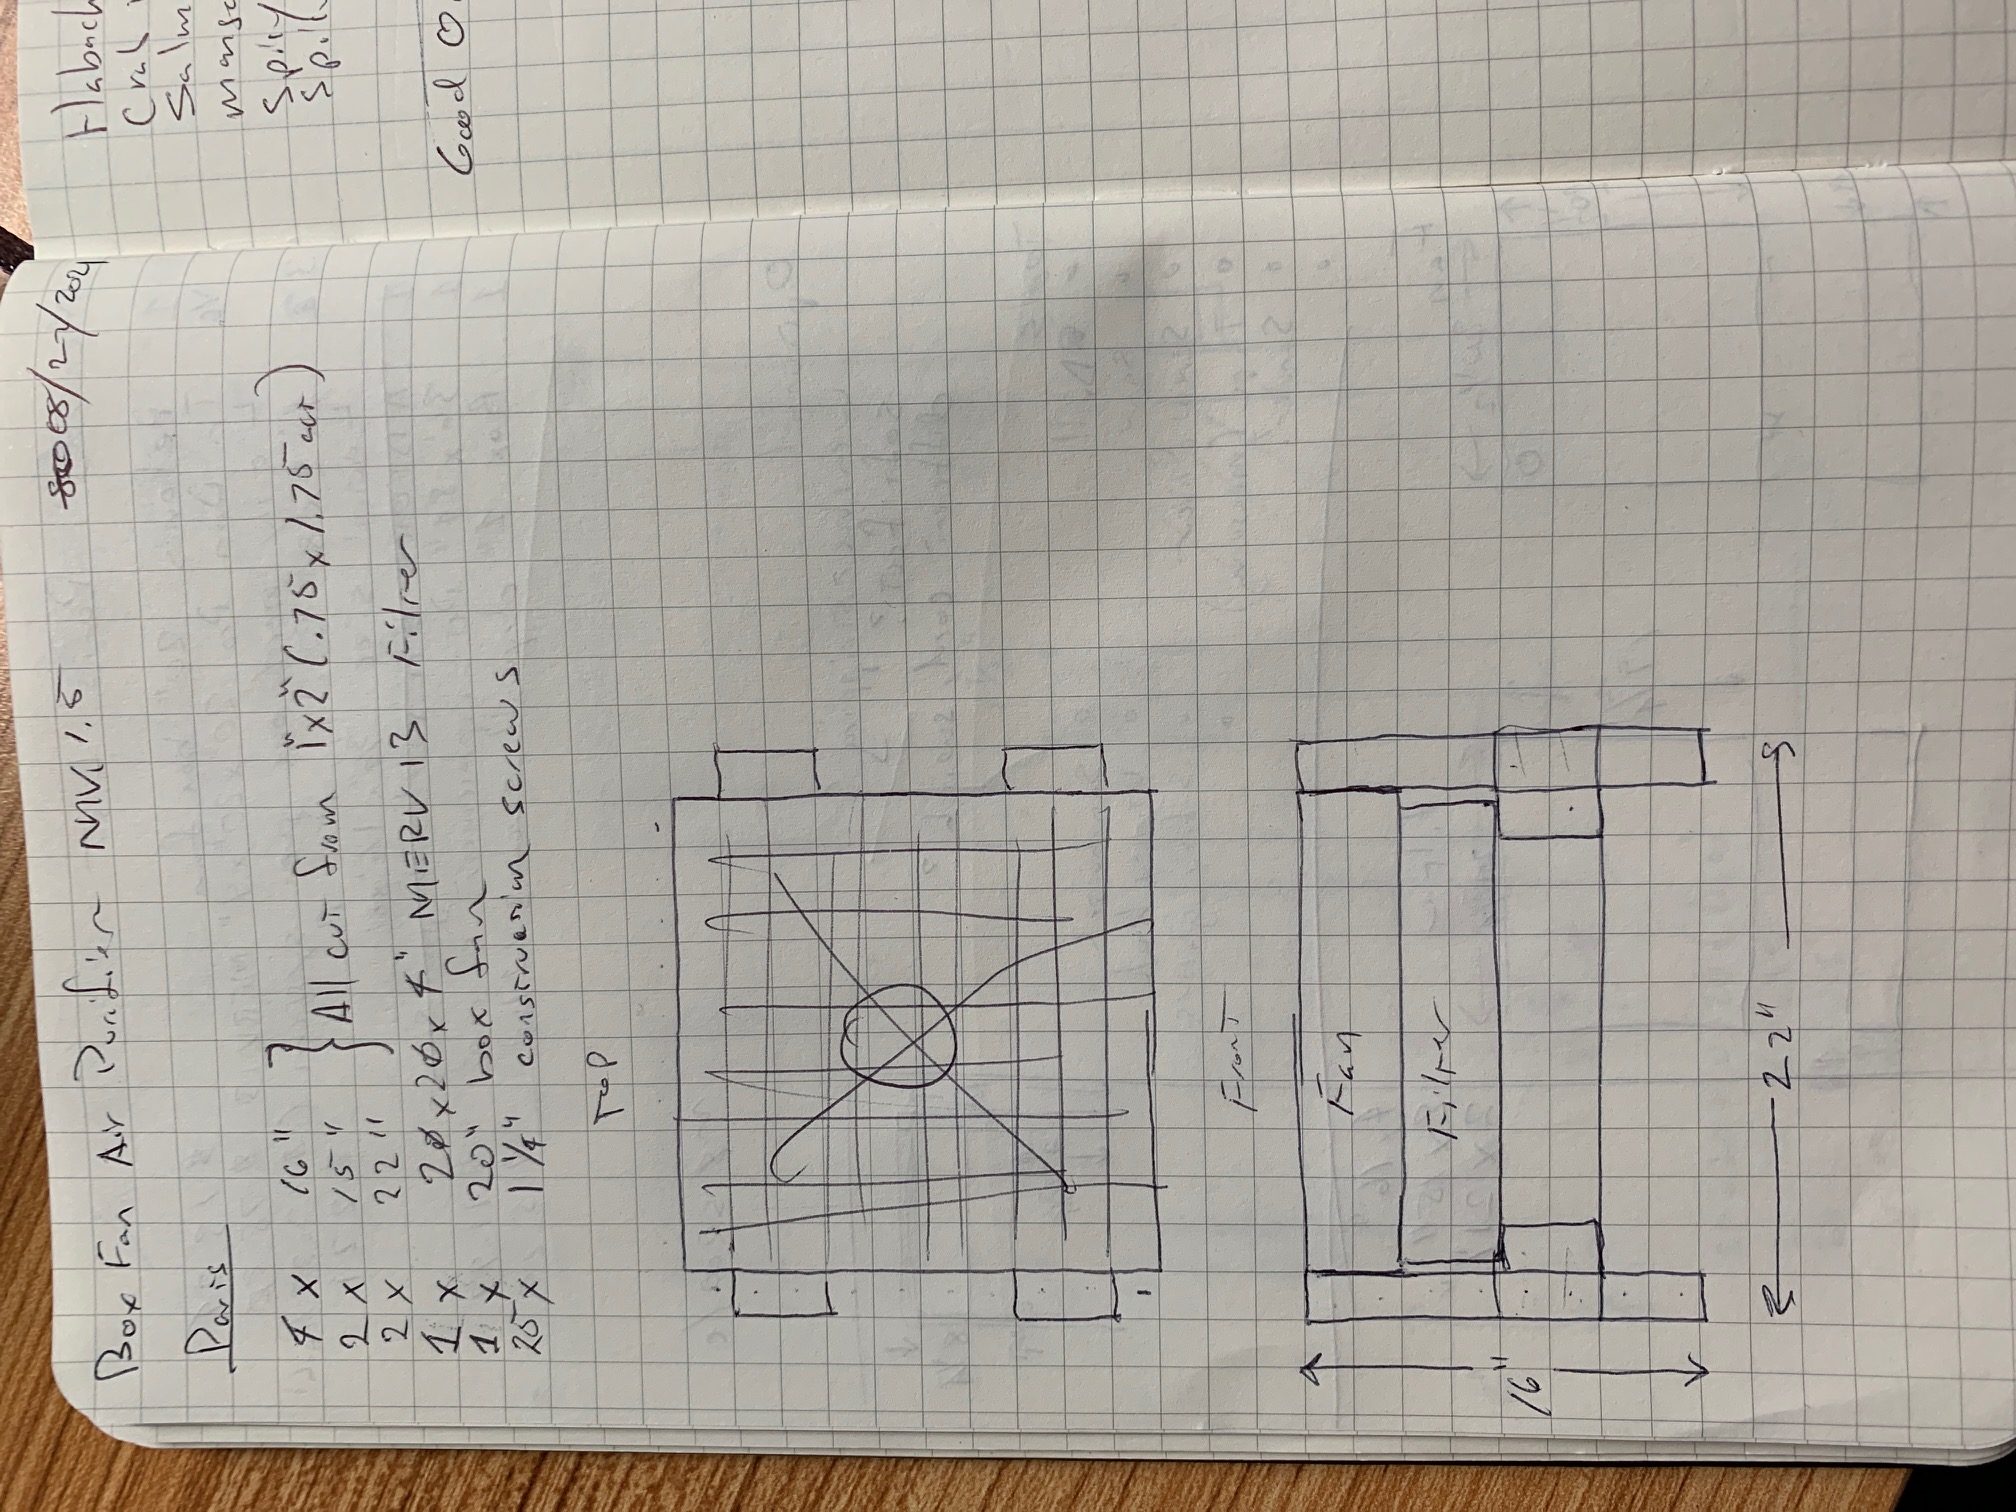
The last part of the purifier is the frame itself. It’s constructed out of 1x2 pine board (.75”x1.75” actual) and 1.25” construction screws. The frame consists of 8 pieces of board cut to the following lengths:
-
4 16”
-
2 15”
-
2 22”
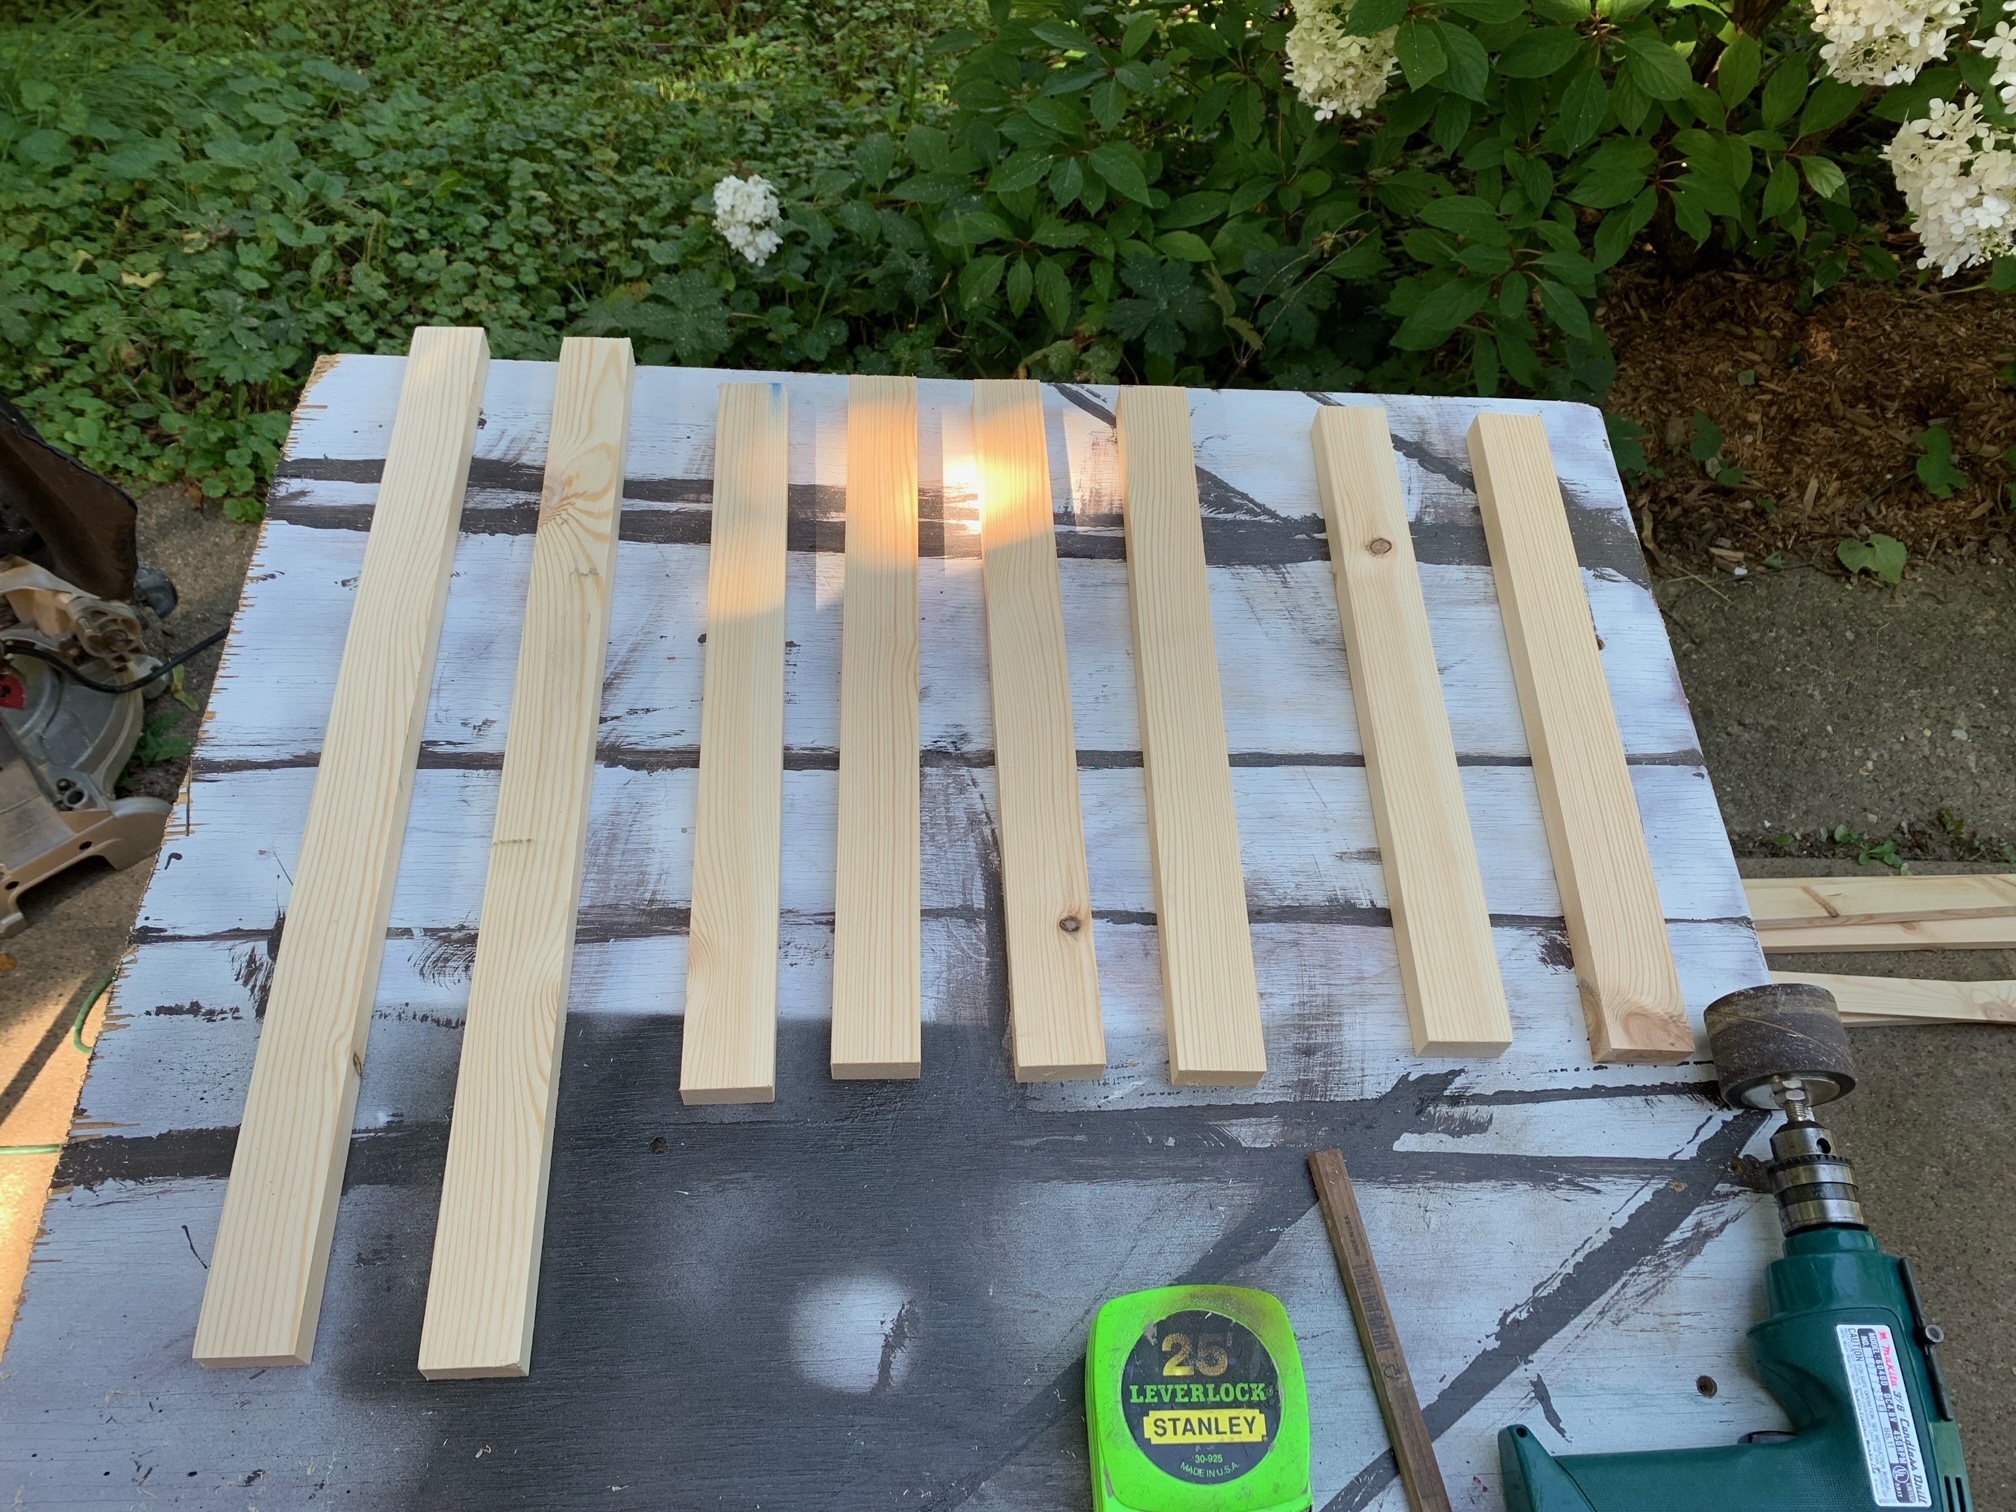
This can be found at most home improvement stores or lumberyards. Two six foot lengths should be sufficient (one eight foot board is just a little too short) and cost should be around $5.
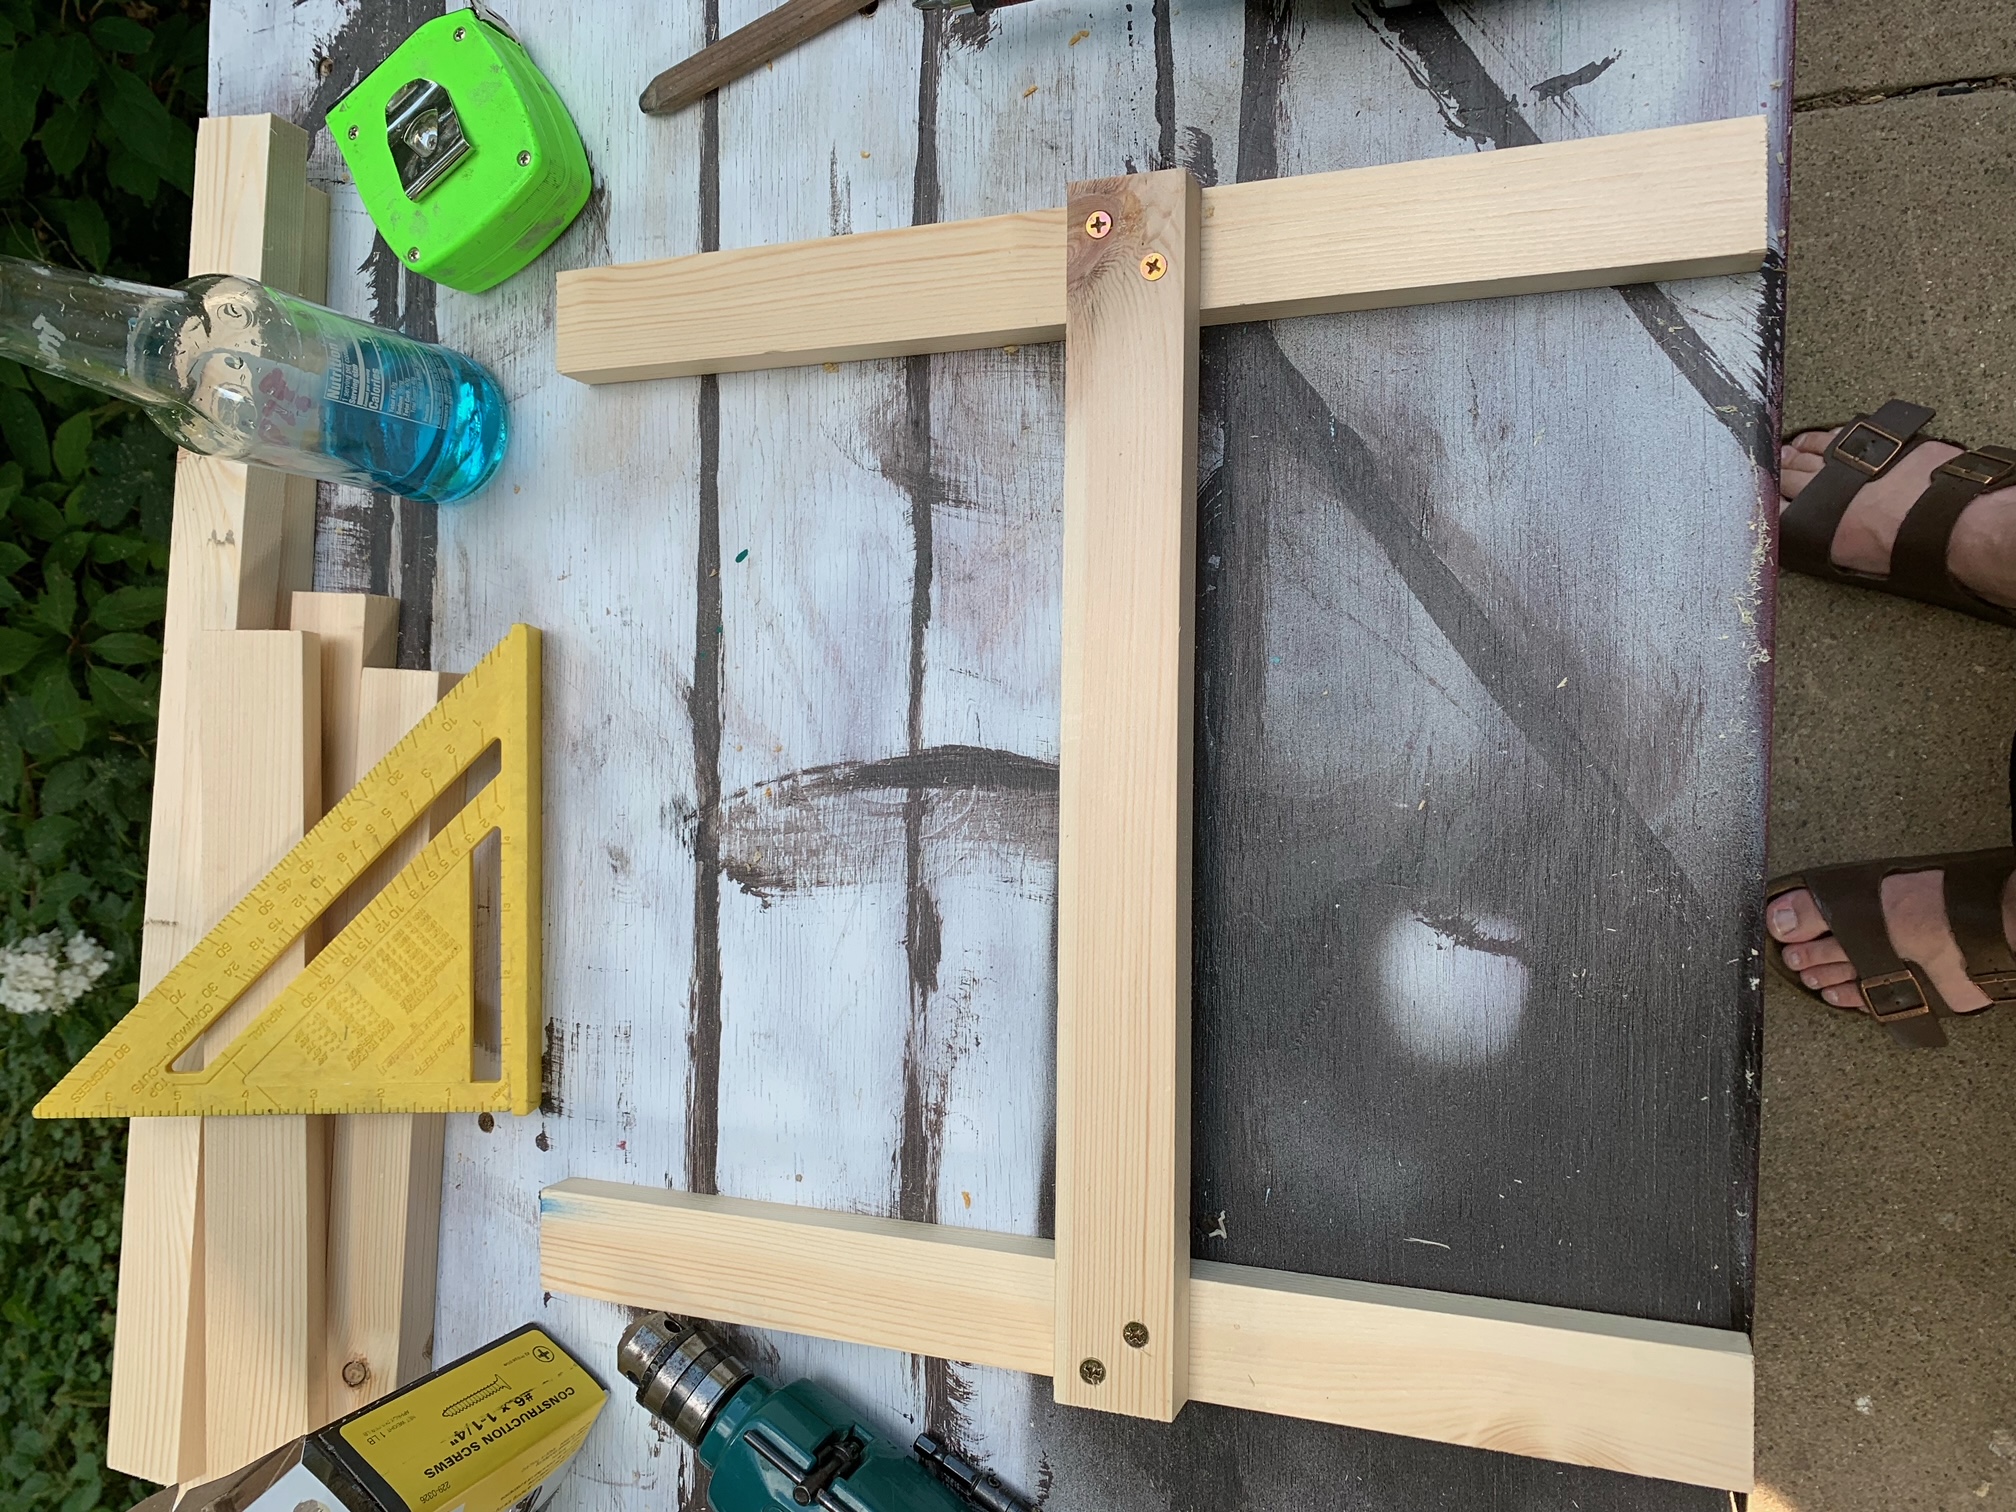
I don’t have a detailed drawing of how the frame goes together yet (it has been changing) but you can get the basic idea from the photos. All screw holes should be pilot-drilled and counter-sunk.
The frame is attached to the fan using 4 of the 1.25” screws. The holes in the frame should be drilled before the fan is in position. The exact location of where the frame is attached to the fan is a matter of fitment (as the filter is held in place by friction).
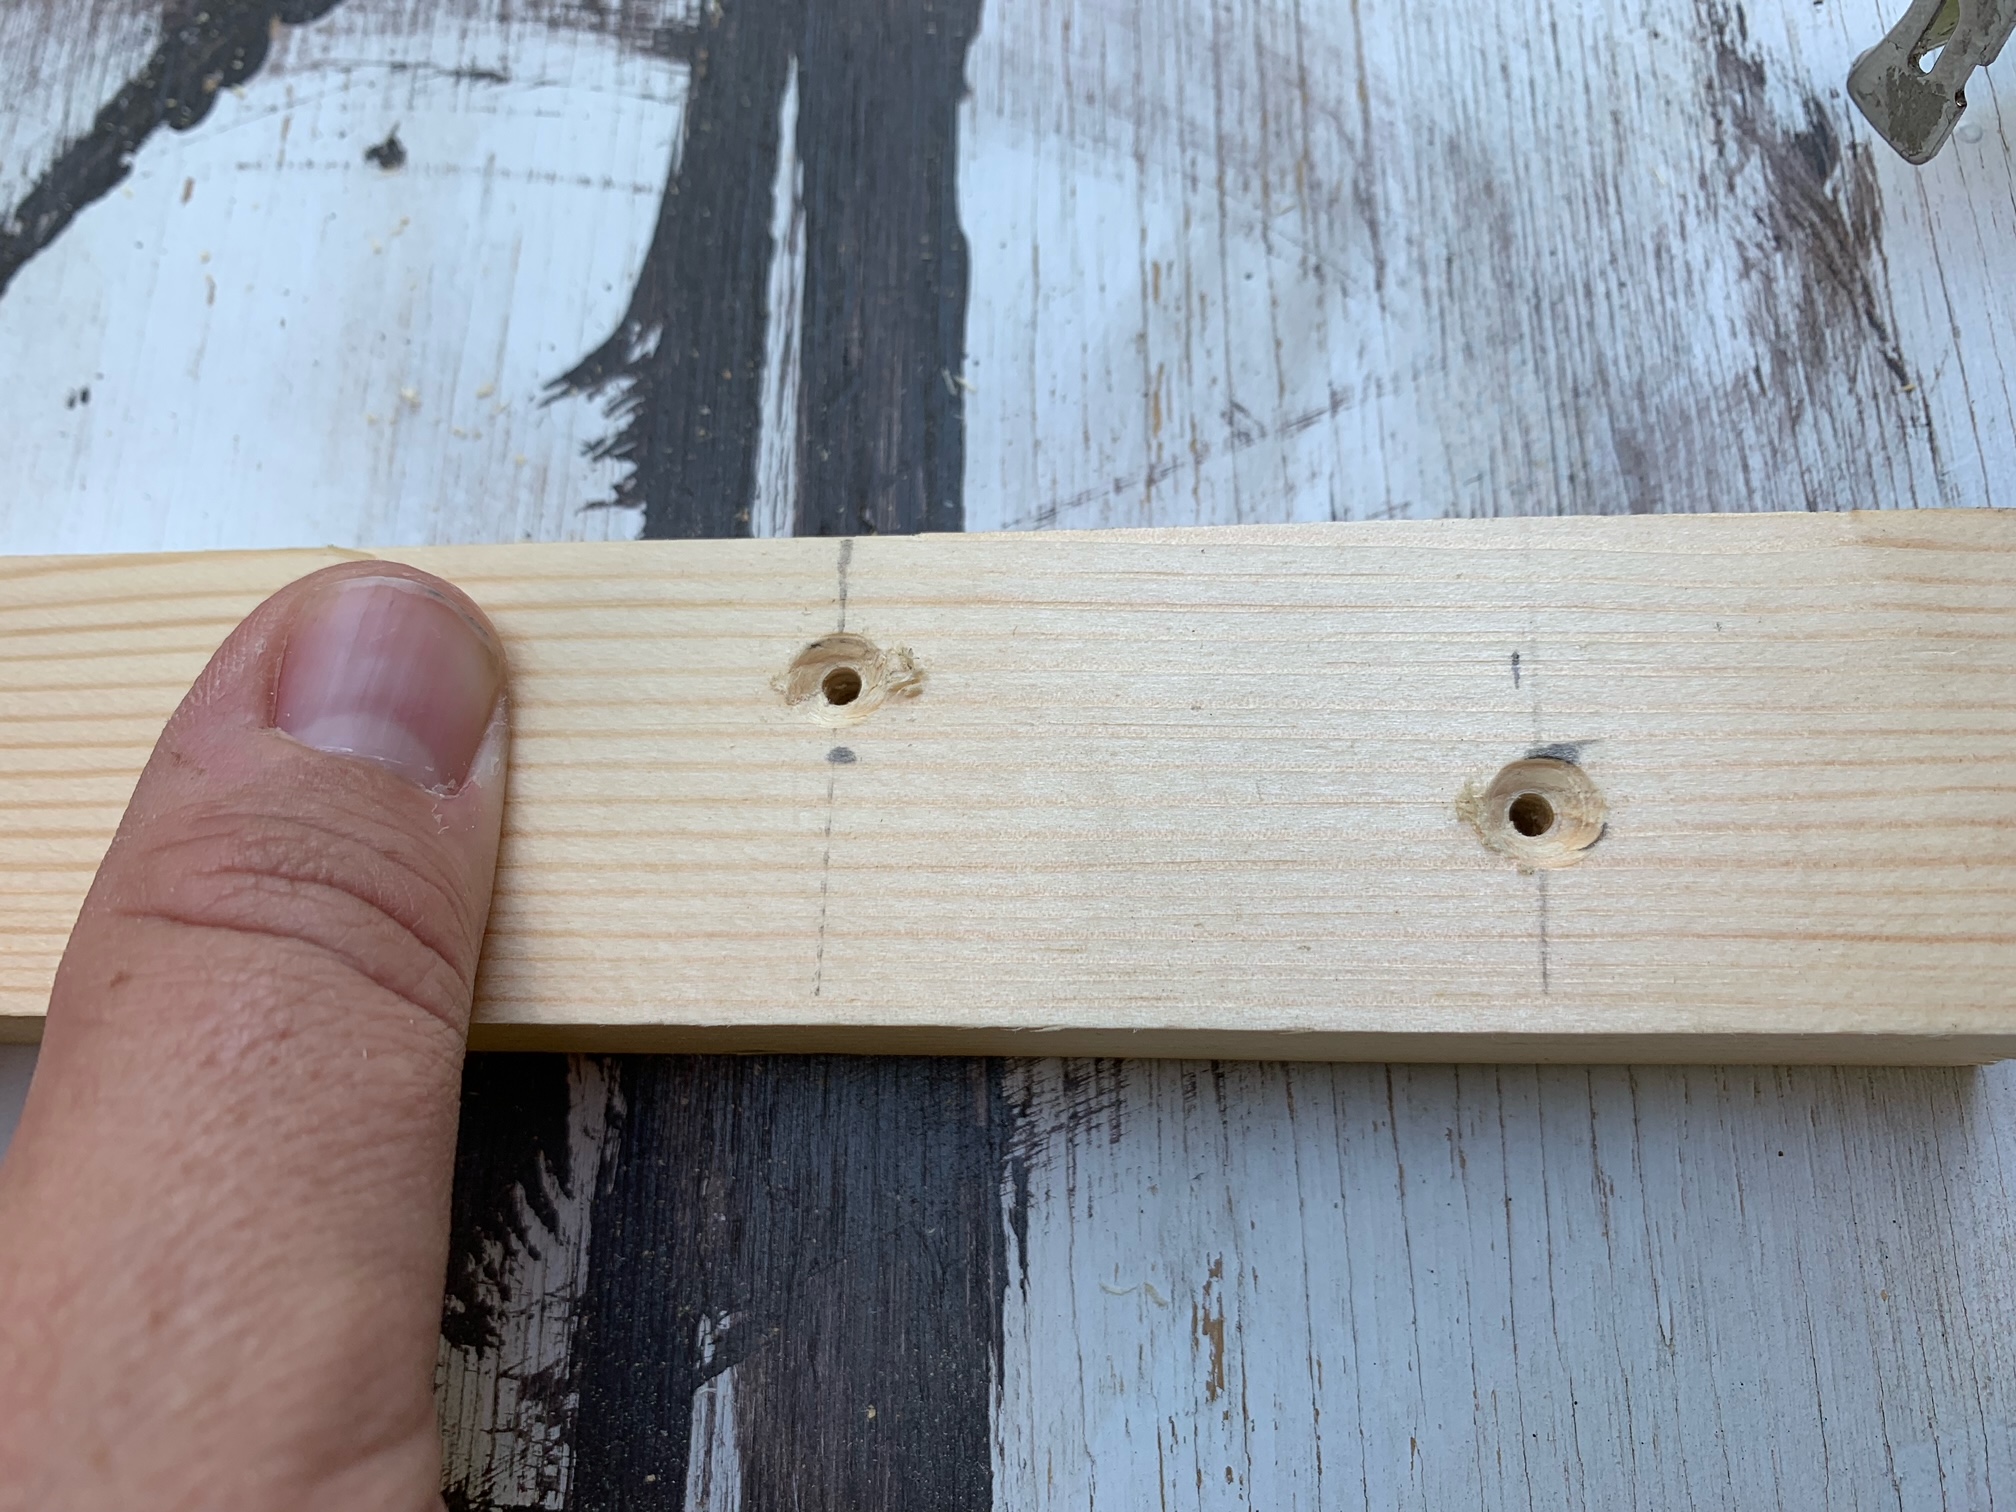
How I did this was by setting fan face-up, the placing the filter on the fan and finally setting the frame rails on top of the filter. Make sure everything is aligned (f lip the feet down if your fan has them to help line things up) and then (carefully!) drive four 1.25” screws through the pre-drilled holes in the frame and into the plastic body of the fan. As the screws are going into plastic, the holes can get stripped very easily so this requires a gentle touch.
Design changes
It was immediately clear that the original frame needed additional support for the filter. This became doubly-obvious when a replacement 20x20x4 filter was obtained. The new filter, it differed not only in length, but in other dimensions as well and could not be held reliably by the frame rails.
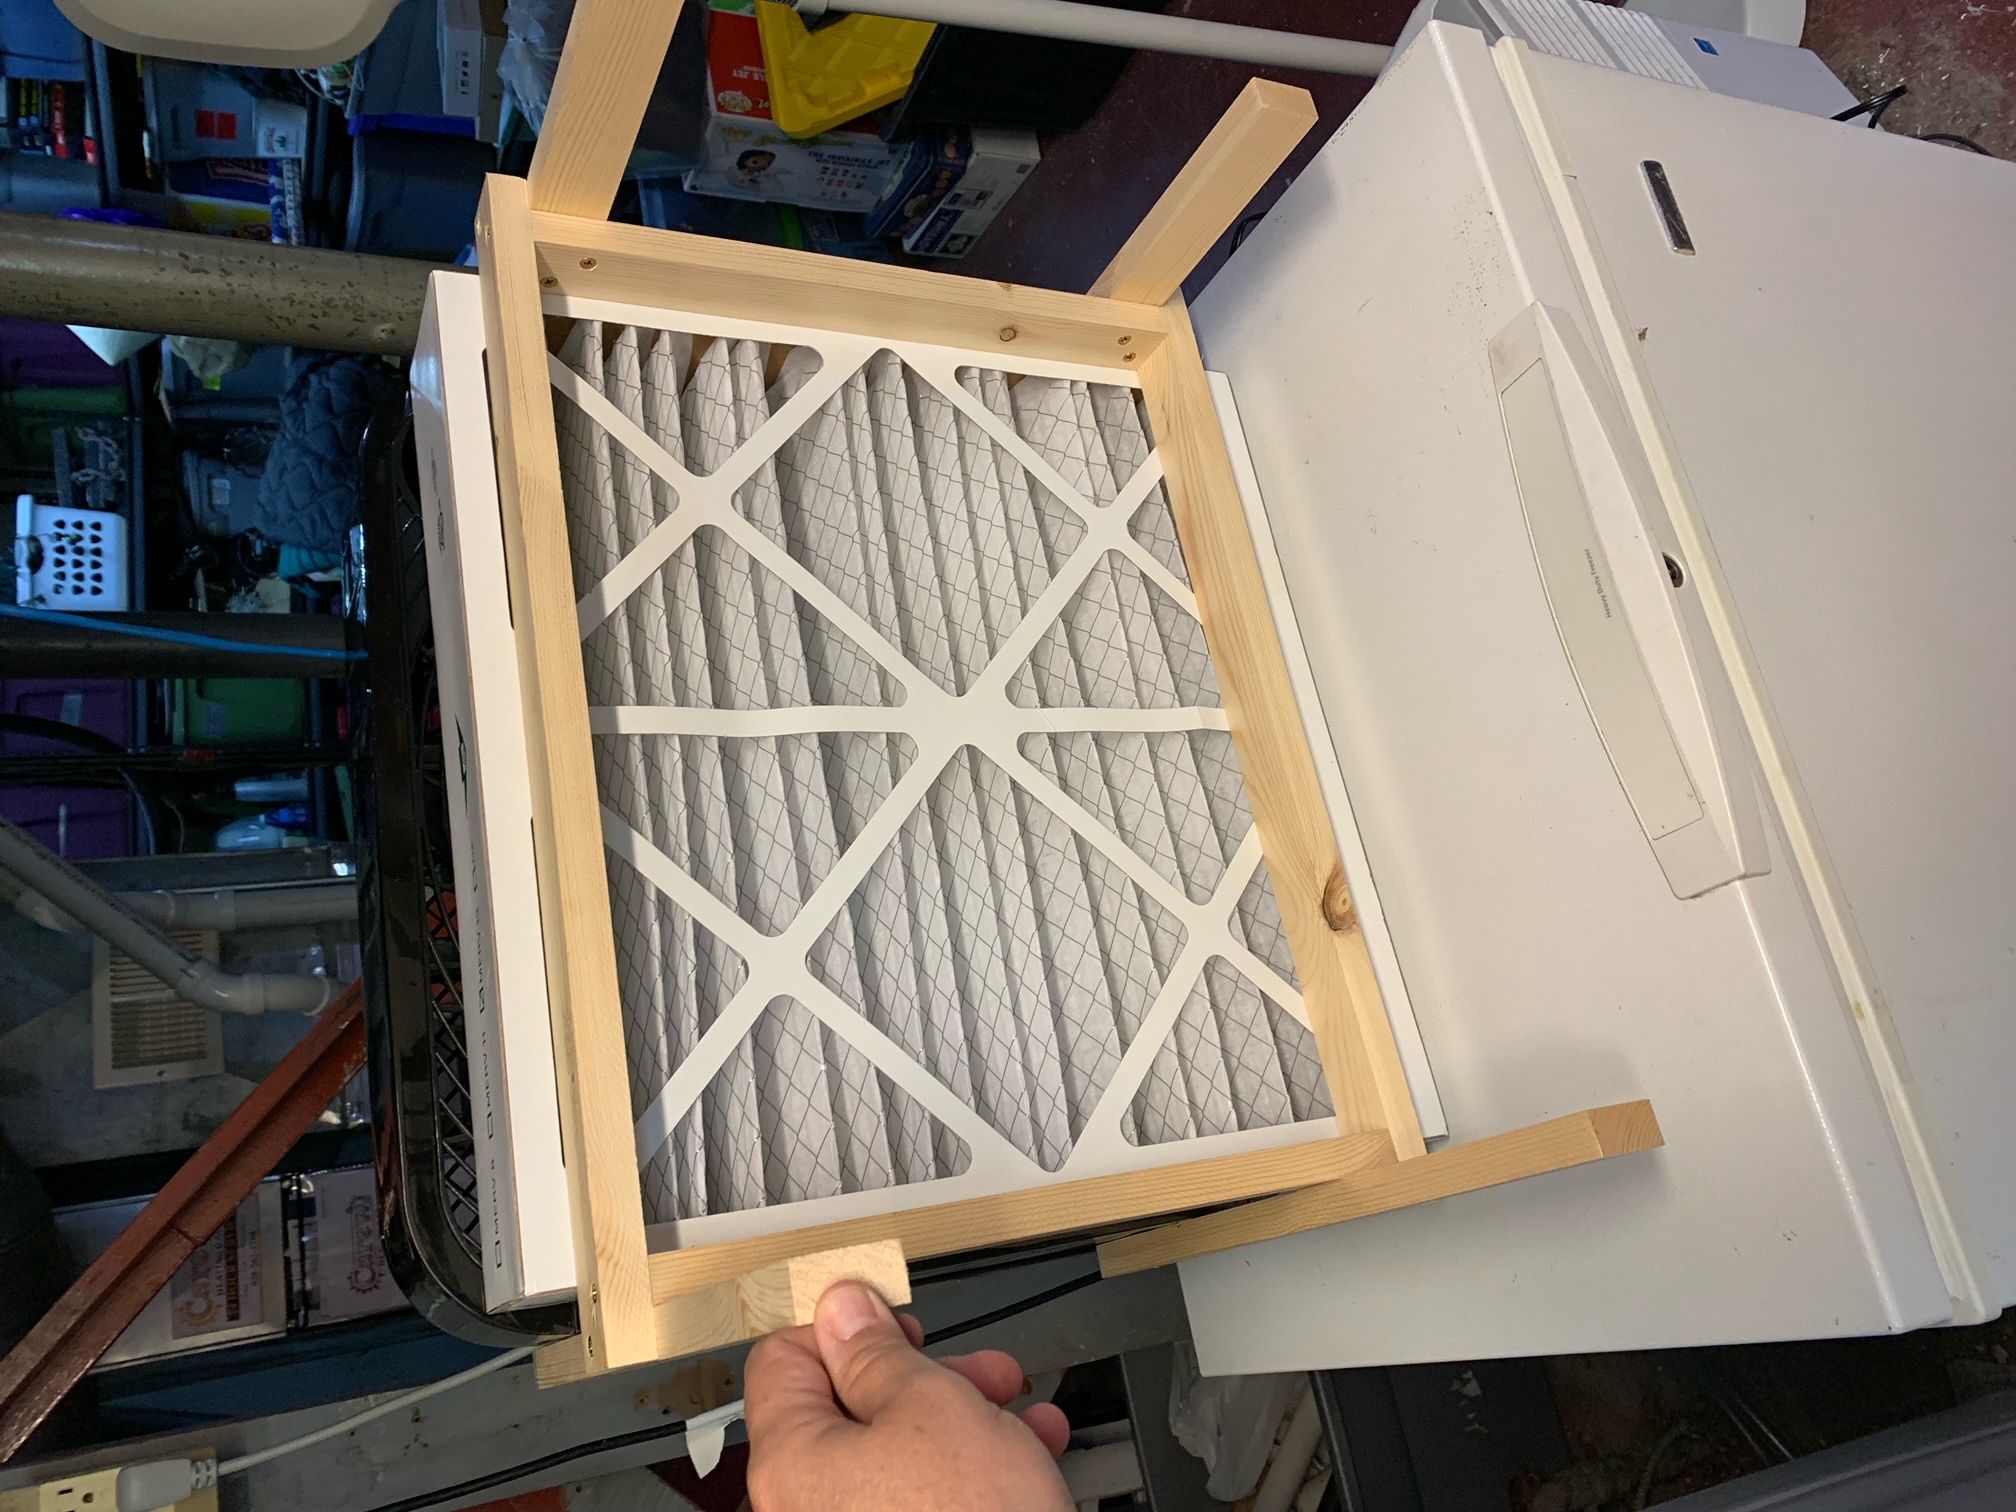
Here the choice of materials was validated. Two additional frame components were added to allow any filter at least 16” in length to be held securely by the frame. The difference in the thickness of the filter was compensated for by adjusting the mounting points of the frame to the fan.
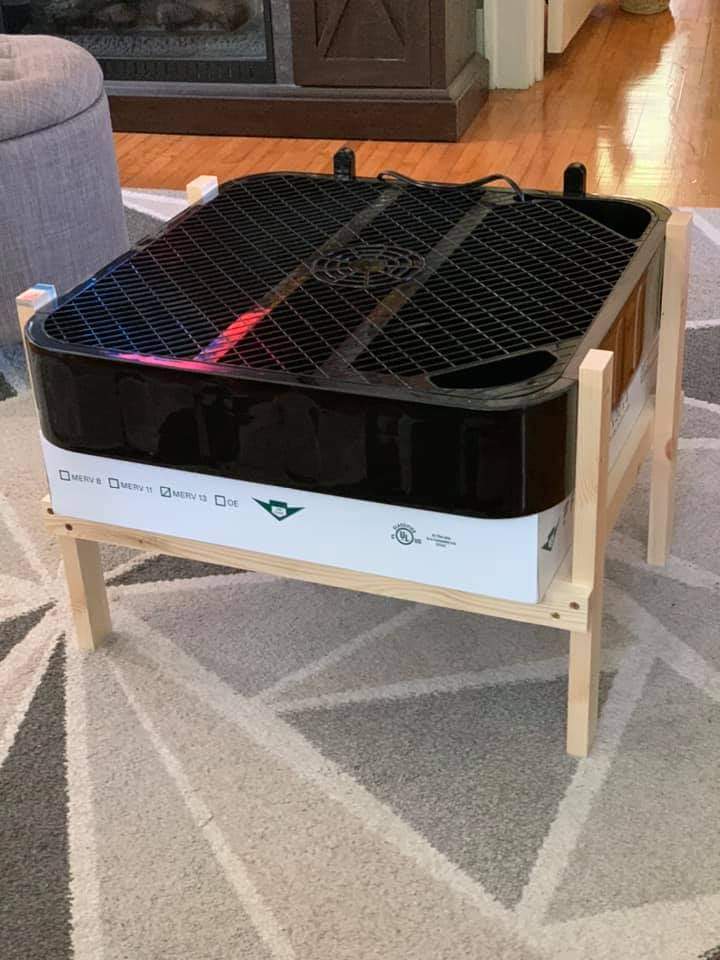
This second iteration of the purifier is sturdy, compact and easy to maintain.
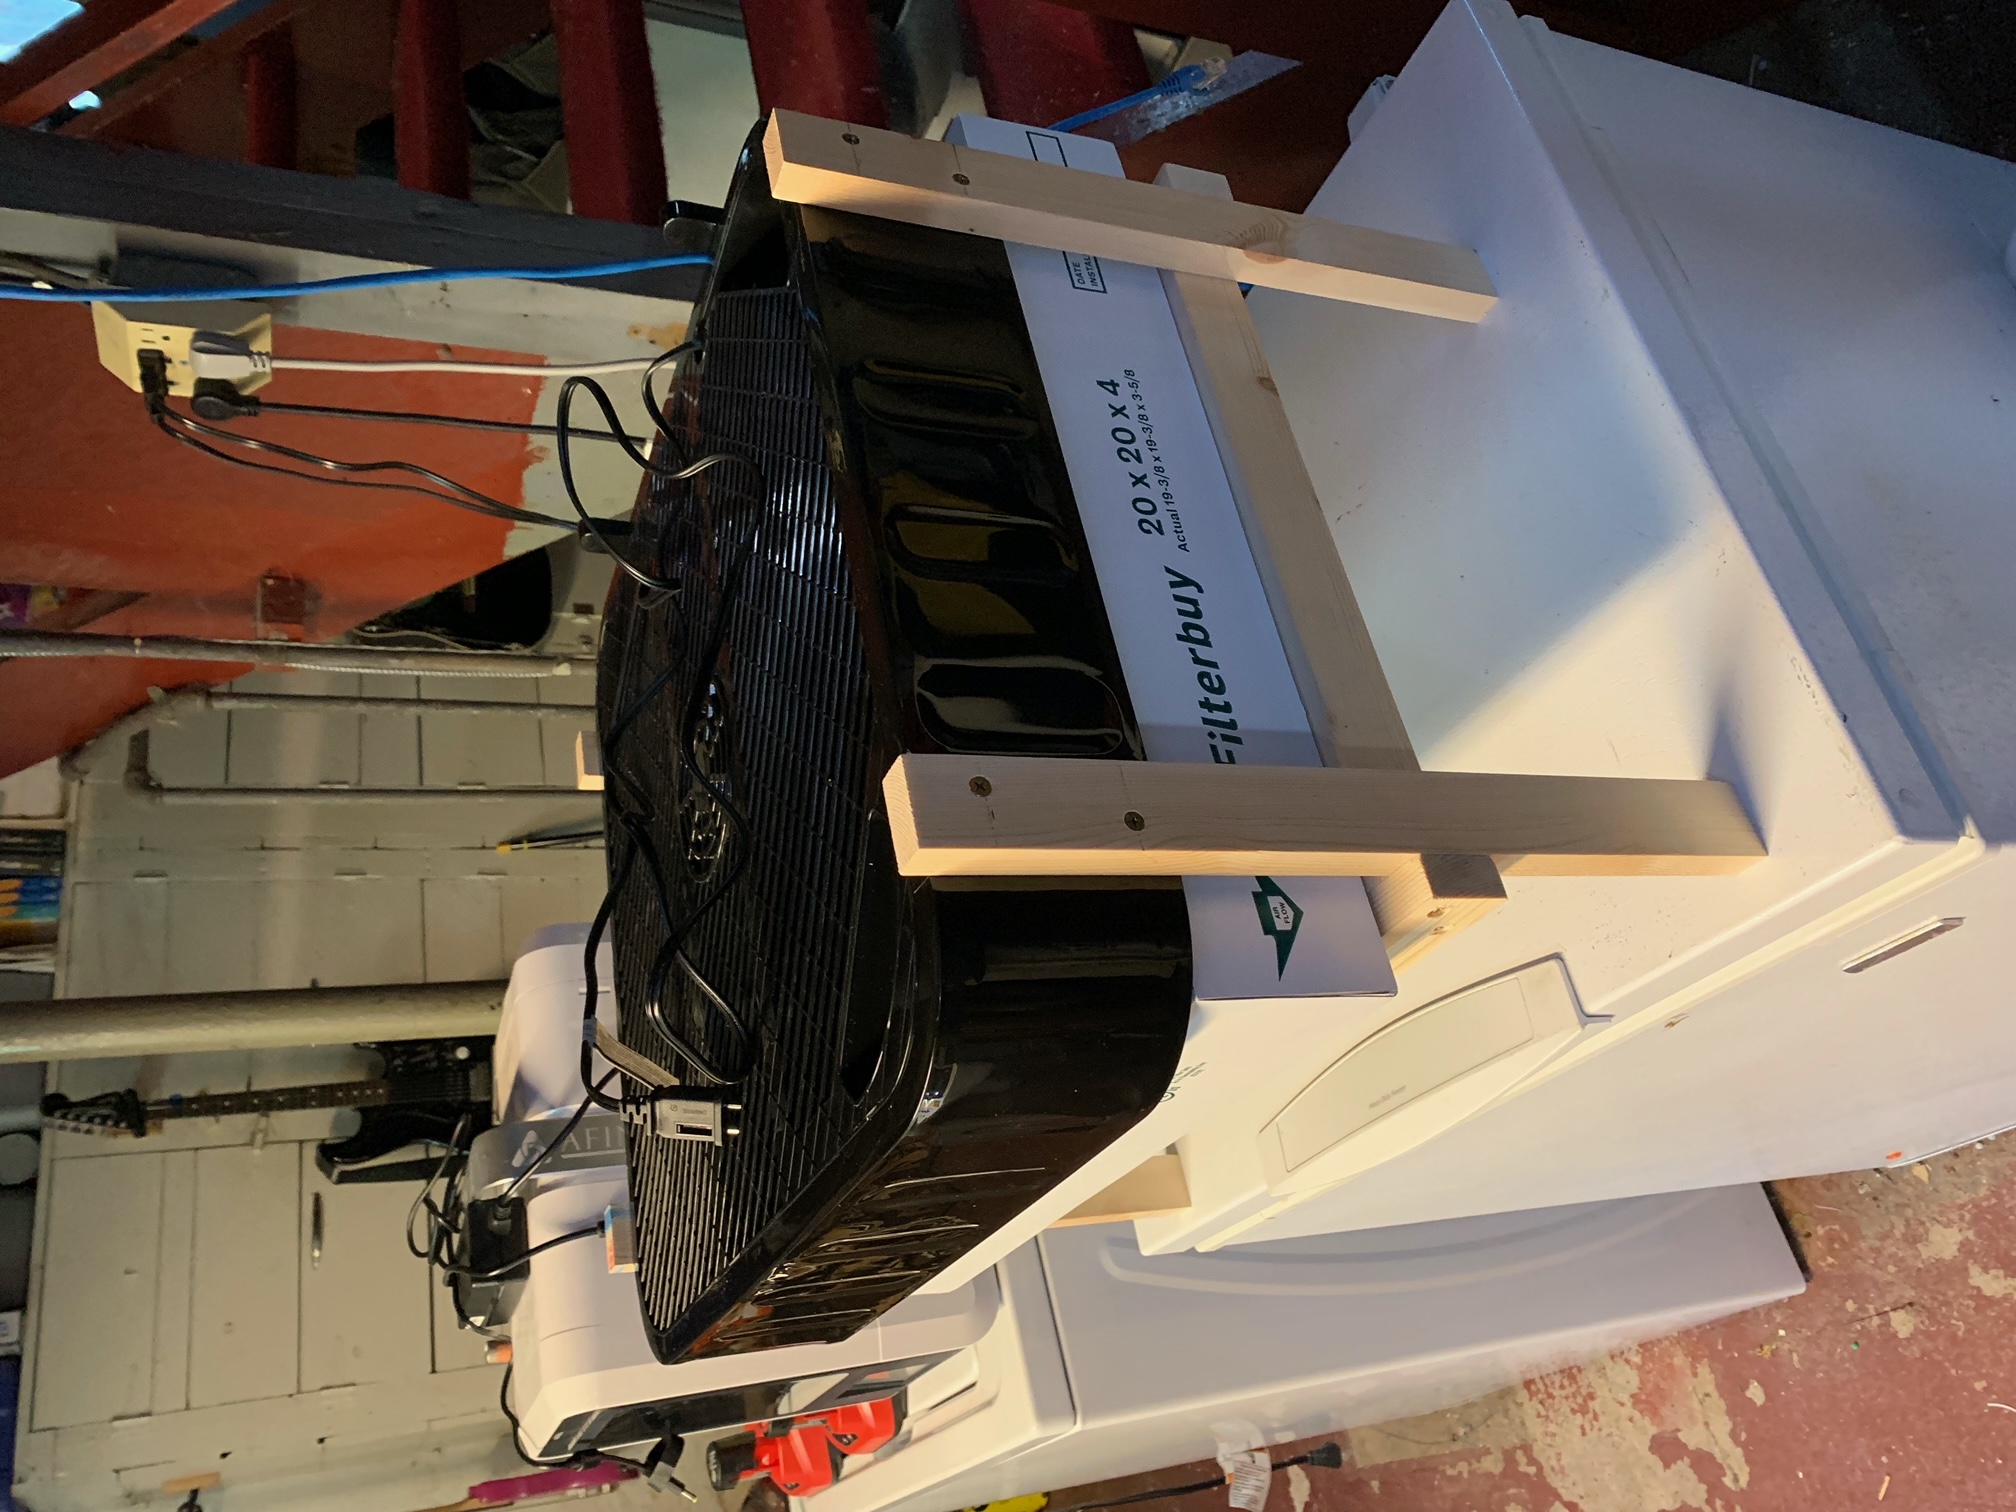
When I have a little more time I’ll draw-up some plans with measurements, but bear in mind that if you build one of these you may need to compensate for differences in the fan and filter size. I was surprised at how much the actual dimensions of the filter differed from their description (even filters from different vendors with the same advertised size).
Getting a good fit will likely require some tweaking. I considered adding some adjustment to the design for this reason, but I hesitate because it will come at the cost of simplicity and increase the parts cost.