

Laser Time!
Last weekend I spent most of a Saturday at the Idea Studio working on Mark II’s front panel. 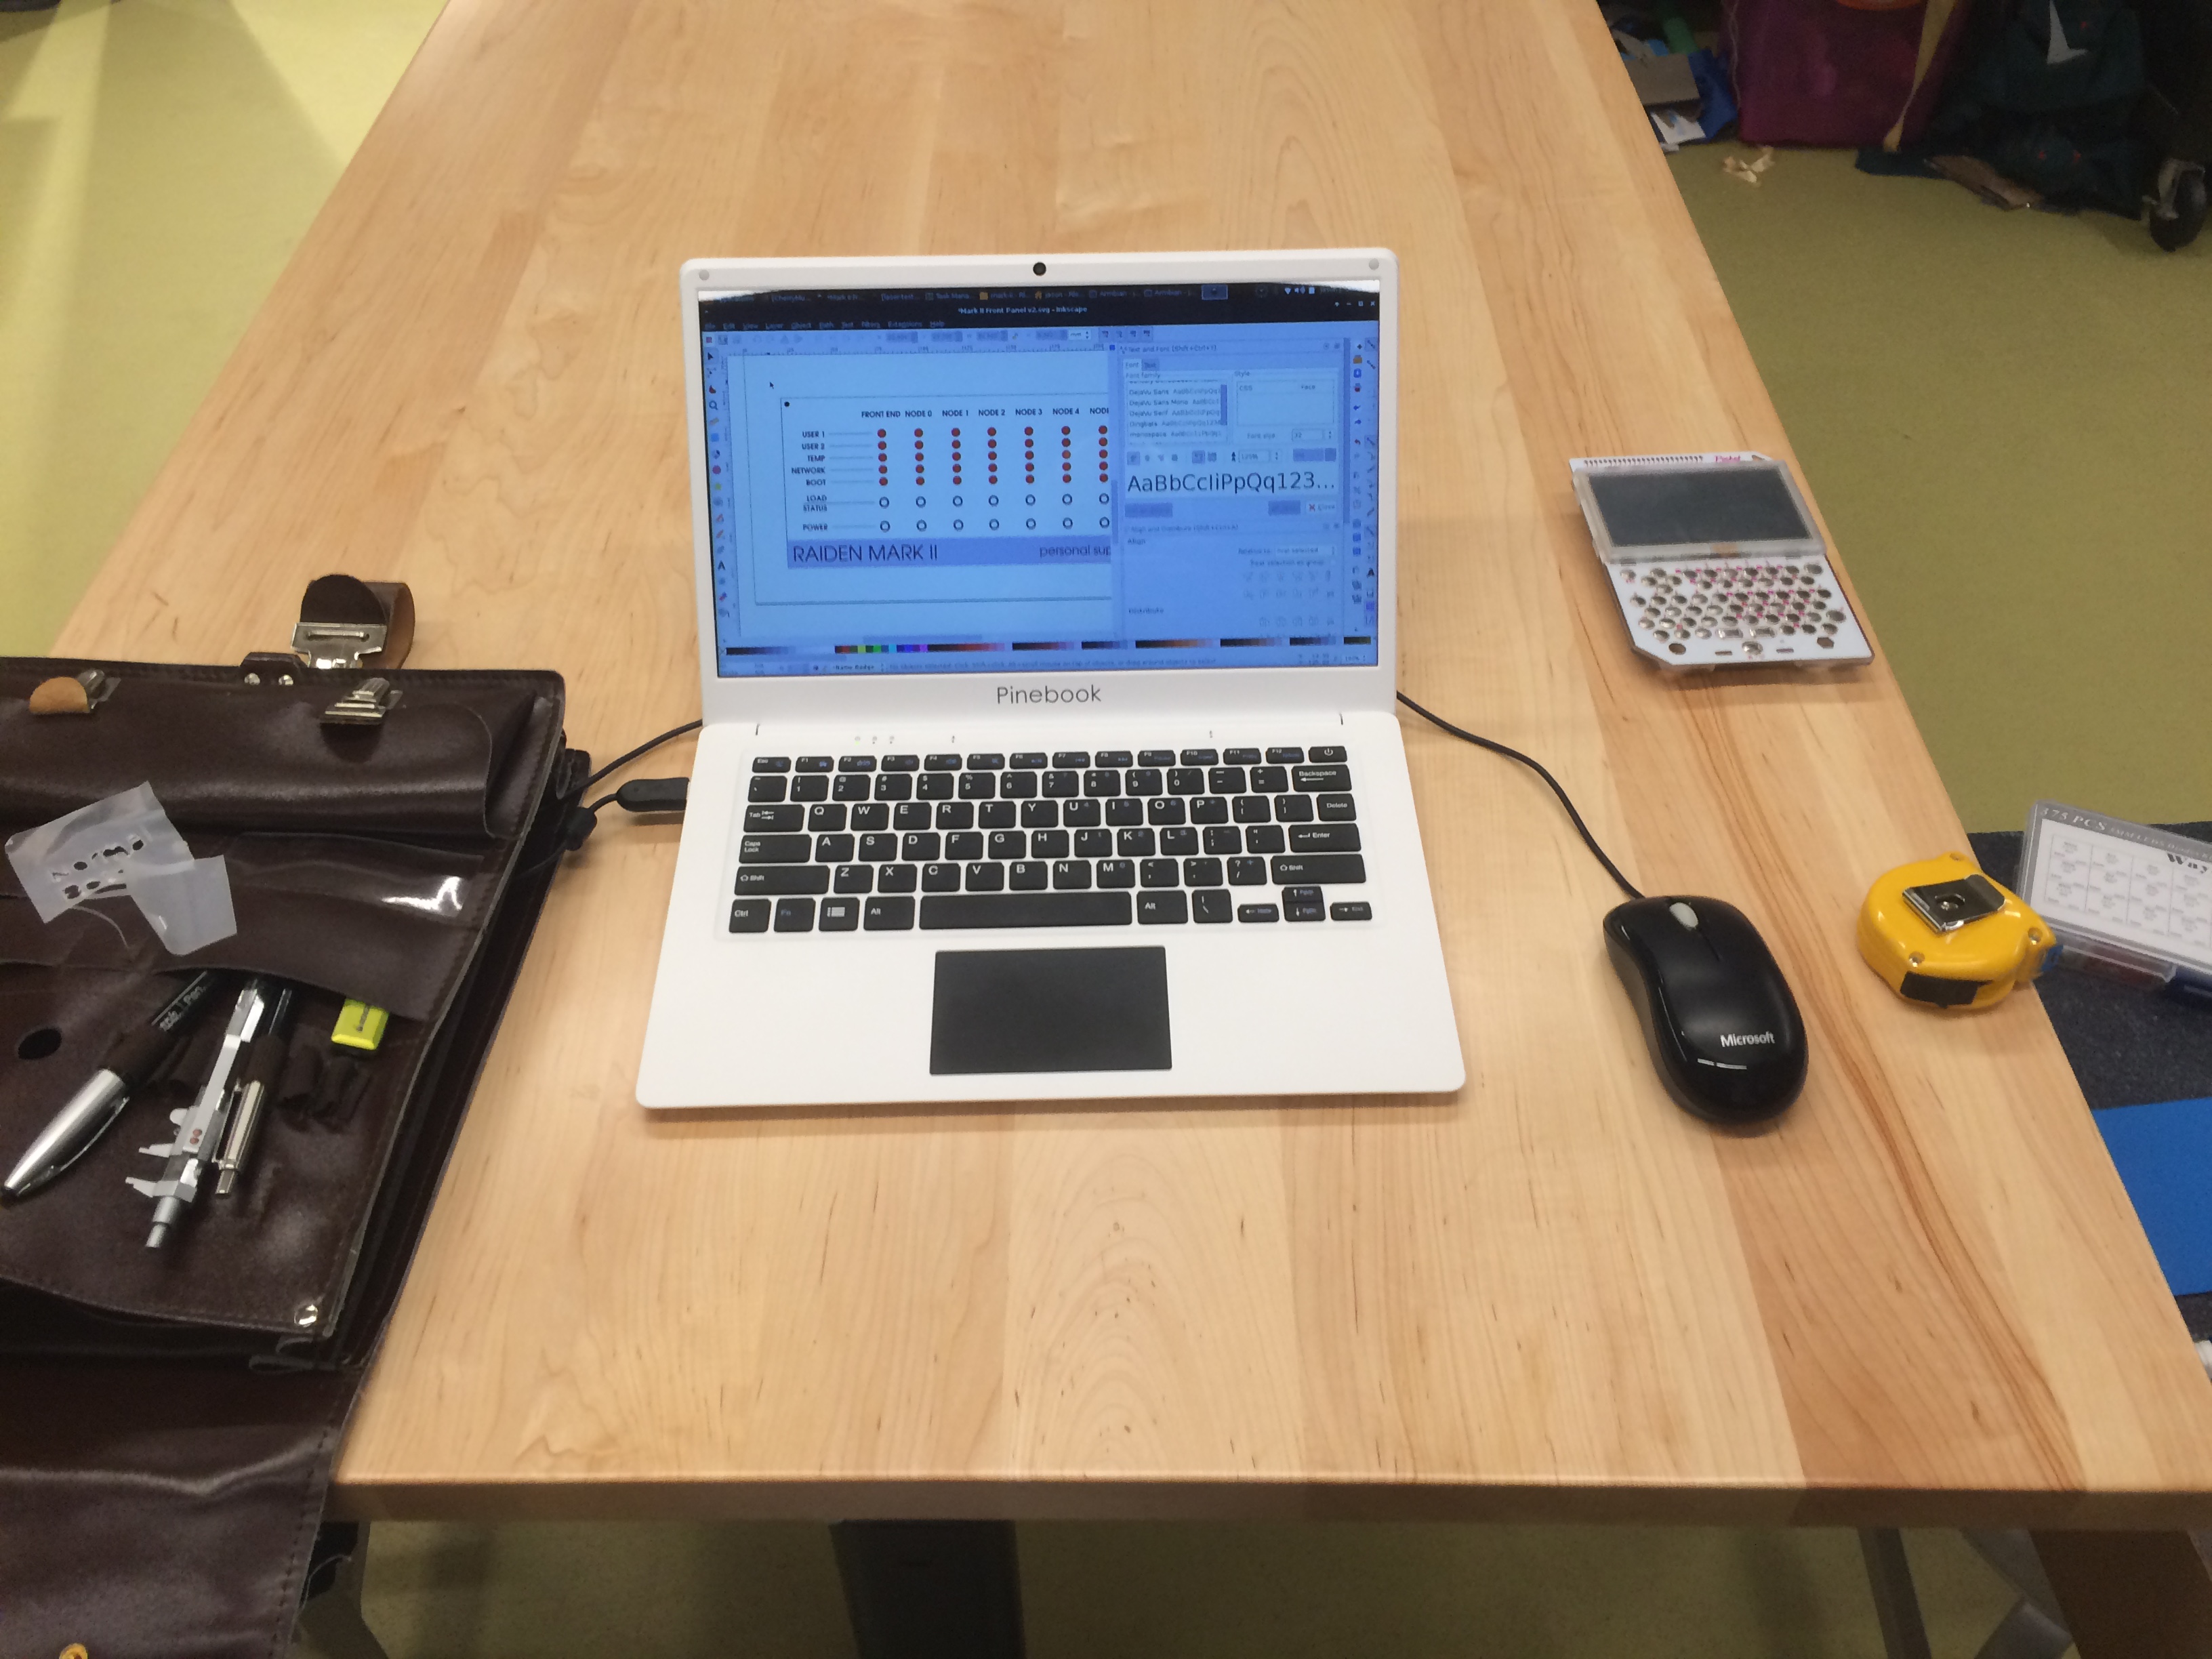 A few weeks earlier I earned my laser cutting badge, so I knew the basics of operating the laser but I’ve never actually used one on a project before. So the first step was learning the workflow and doing some experiments to dial-in the settings for the material I’m working with.
  I picked-up some 3mm acrylic sheet (transparent and black) to cut the panel from. Based on my research, this seemed thick enough to do the job but thin enough that the 40 watt laser should be able to cut it. Turns out the laser has no problem cutting this. I probably could have gone even thicker but even this thickness caused other problems I’ll describe below.
 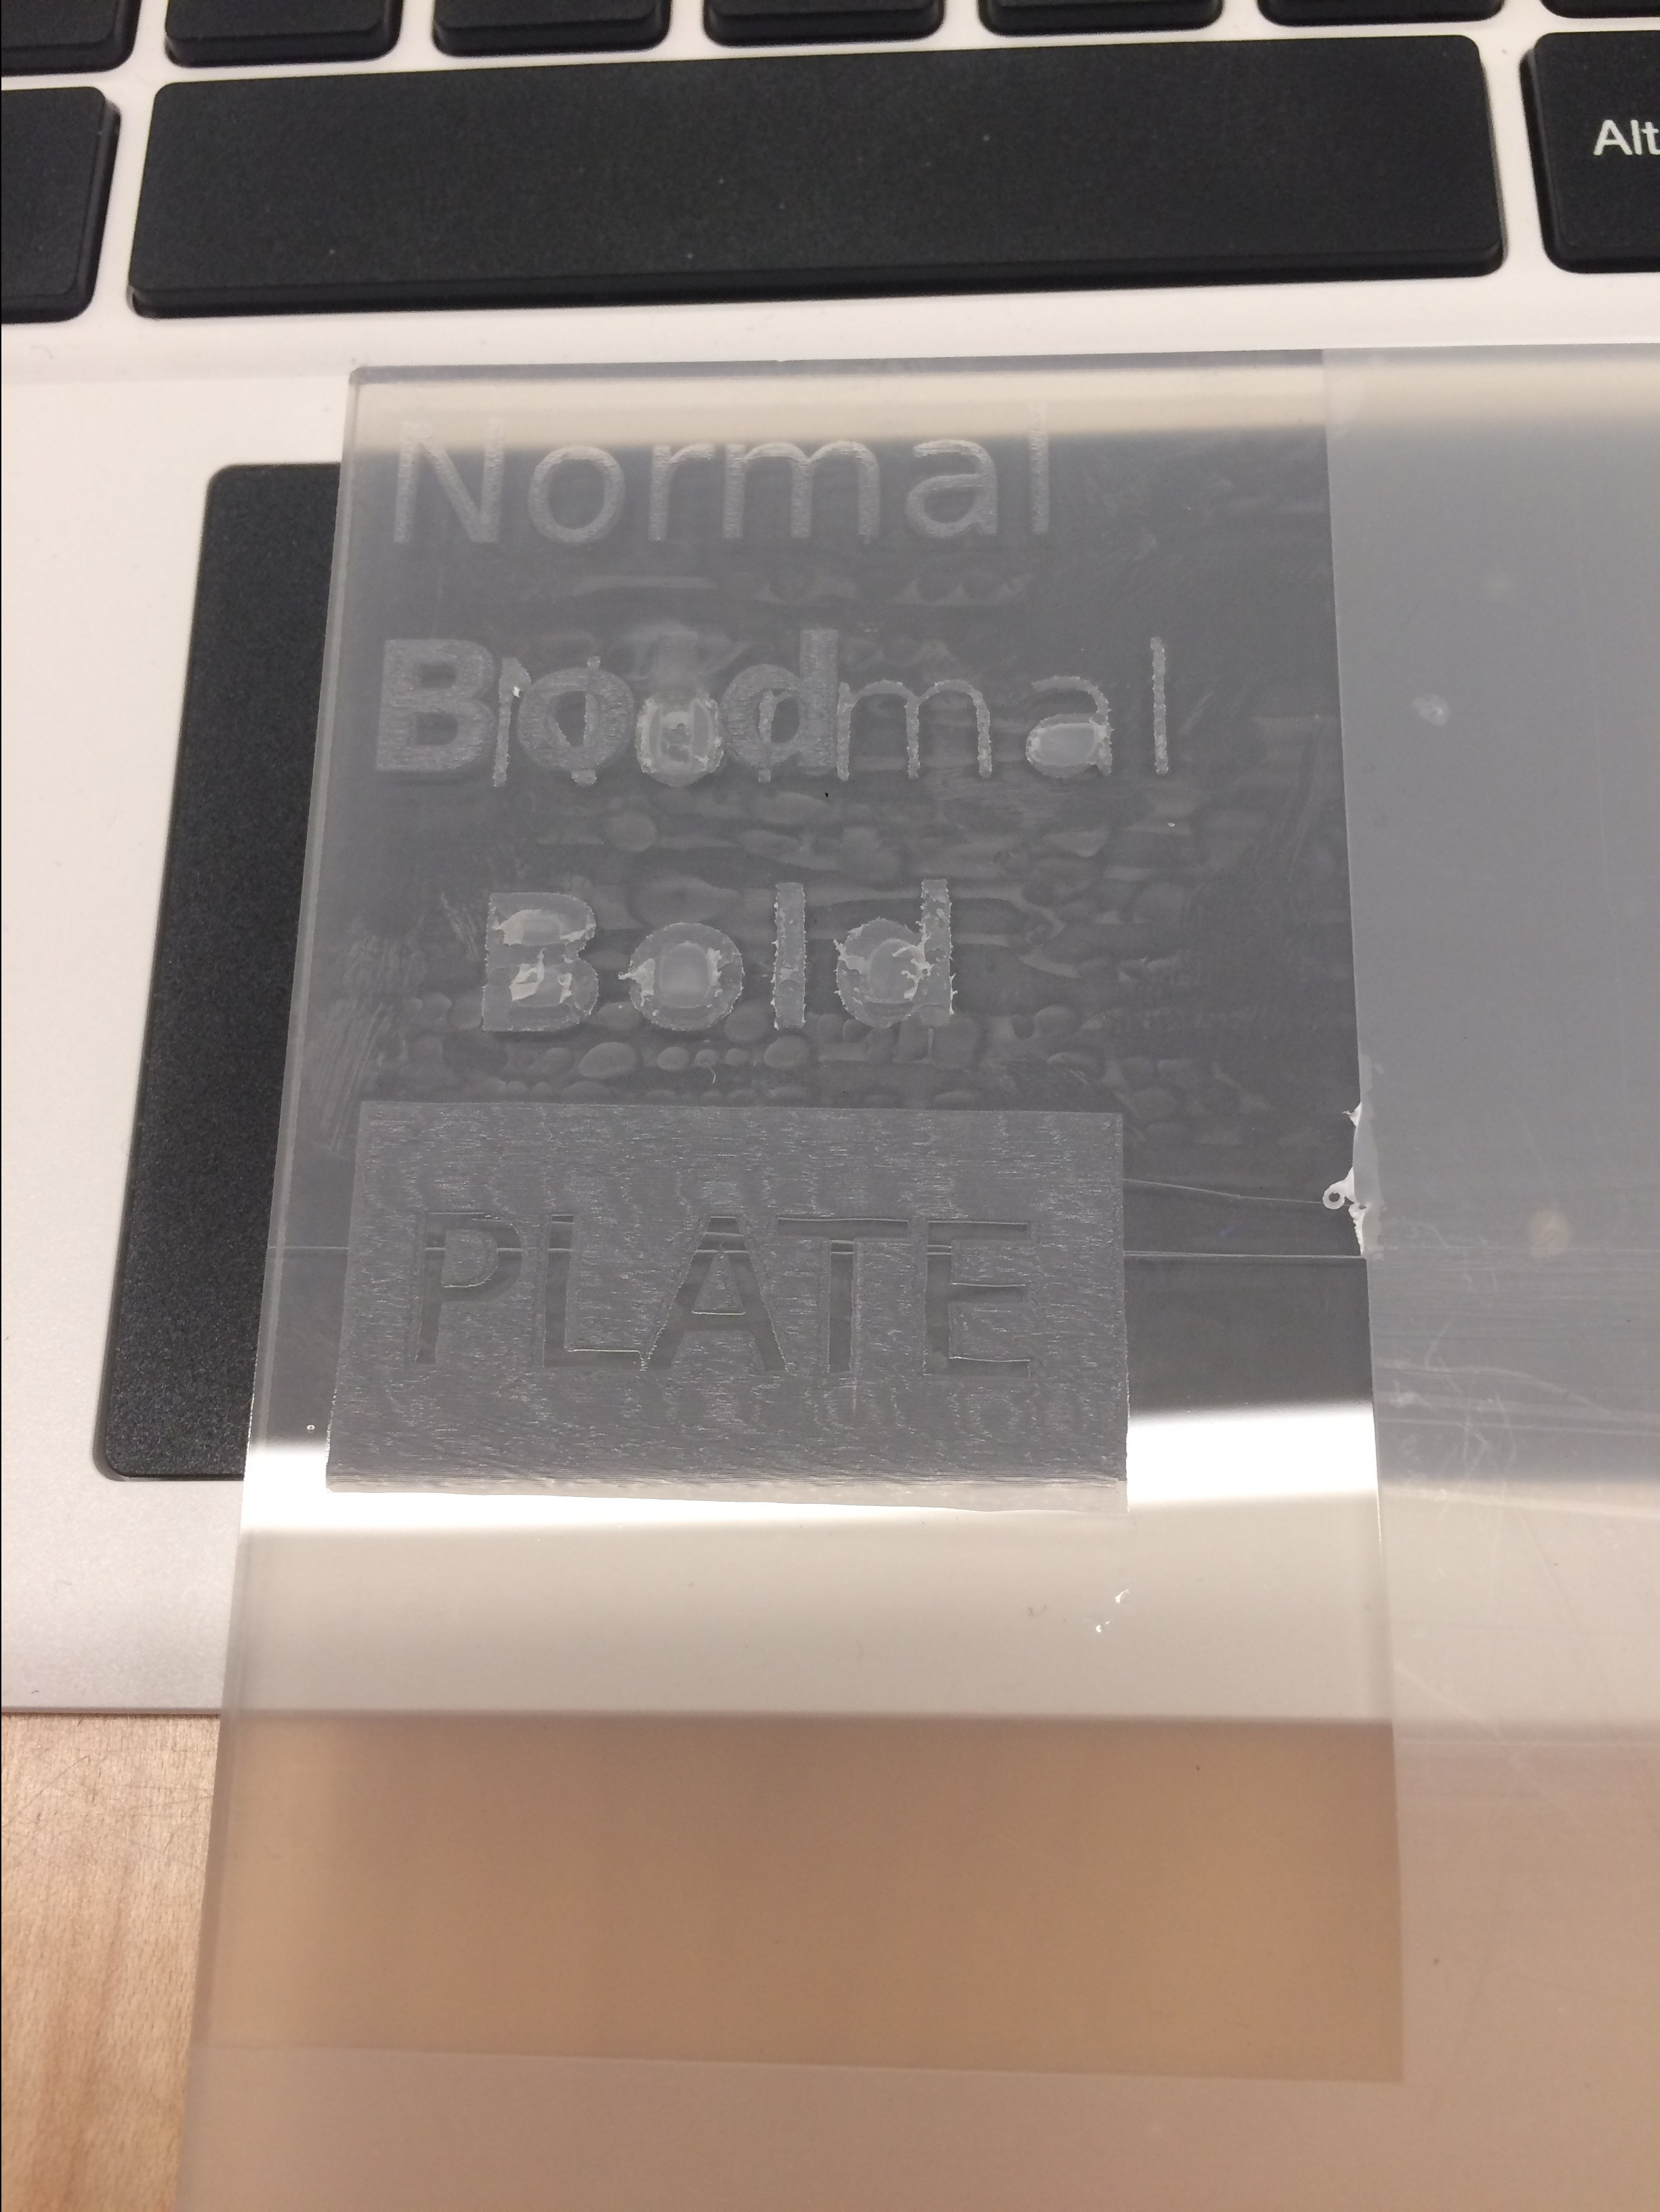 Based on these tests I settled on the following settings:
- Cutting: vector cut mode, power 100%, speed 25%, 10 passes
- Engraving: raster engrave mode, power 100%, speed 100%, 1 pass
Once I had the settings for cutting and engraving figured out, I set the laser loose on a front panel design I made awhile back. While it was busy cutting that, I re-worked the panel based on the results of some fitting tests (I’ll leave the details of that to future post). This ability to literally multitask (doing two things simultaneously) is one of my favorite things about working with robots.
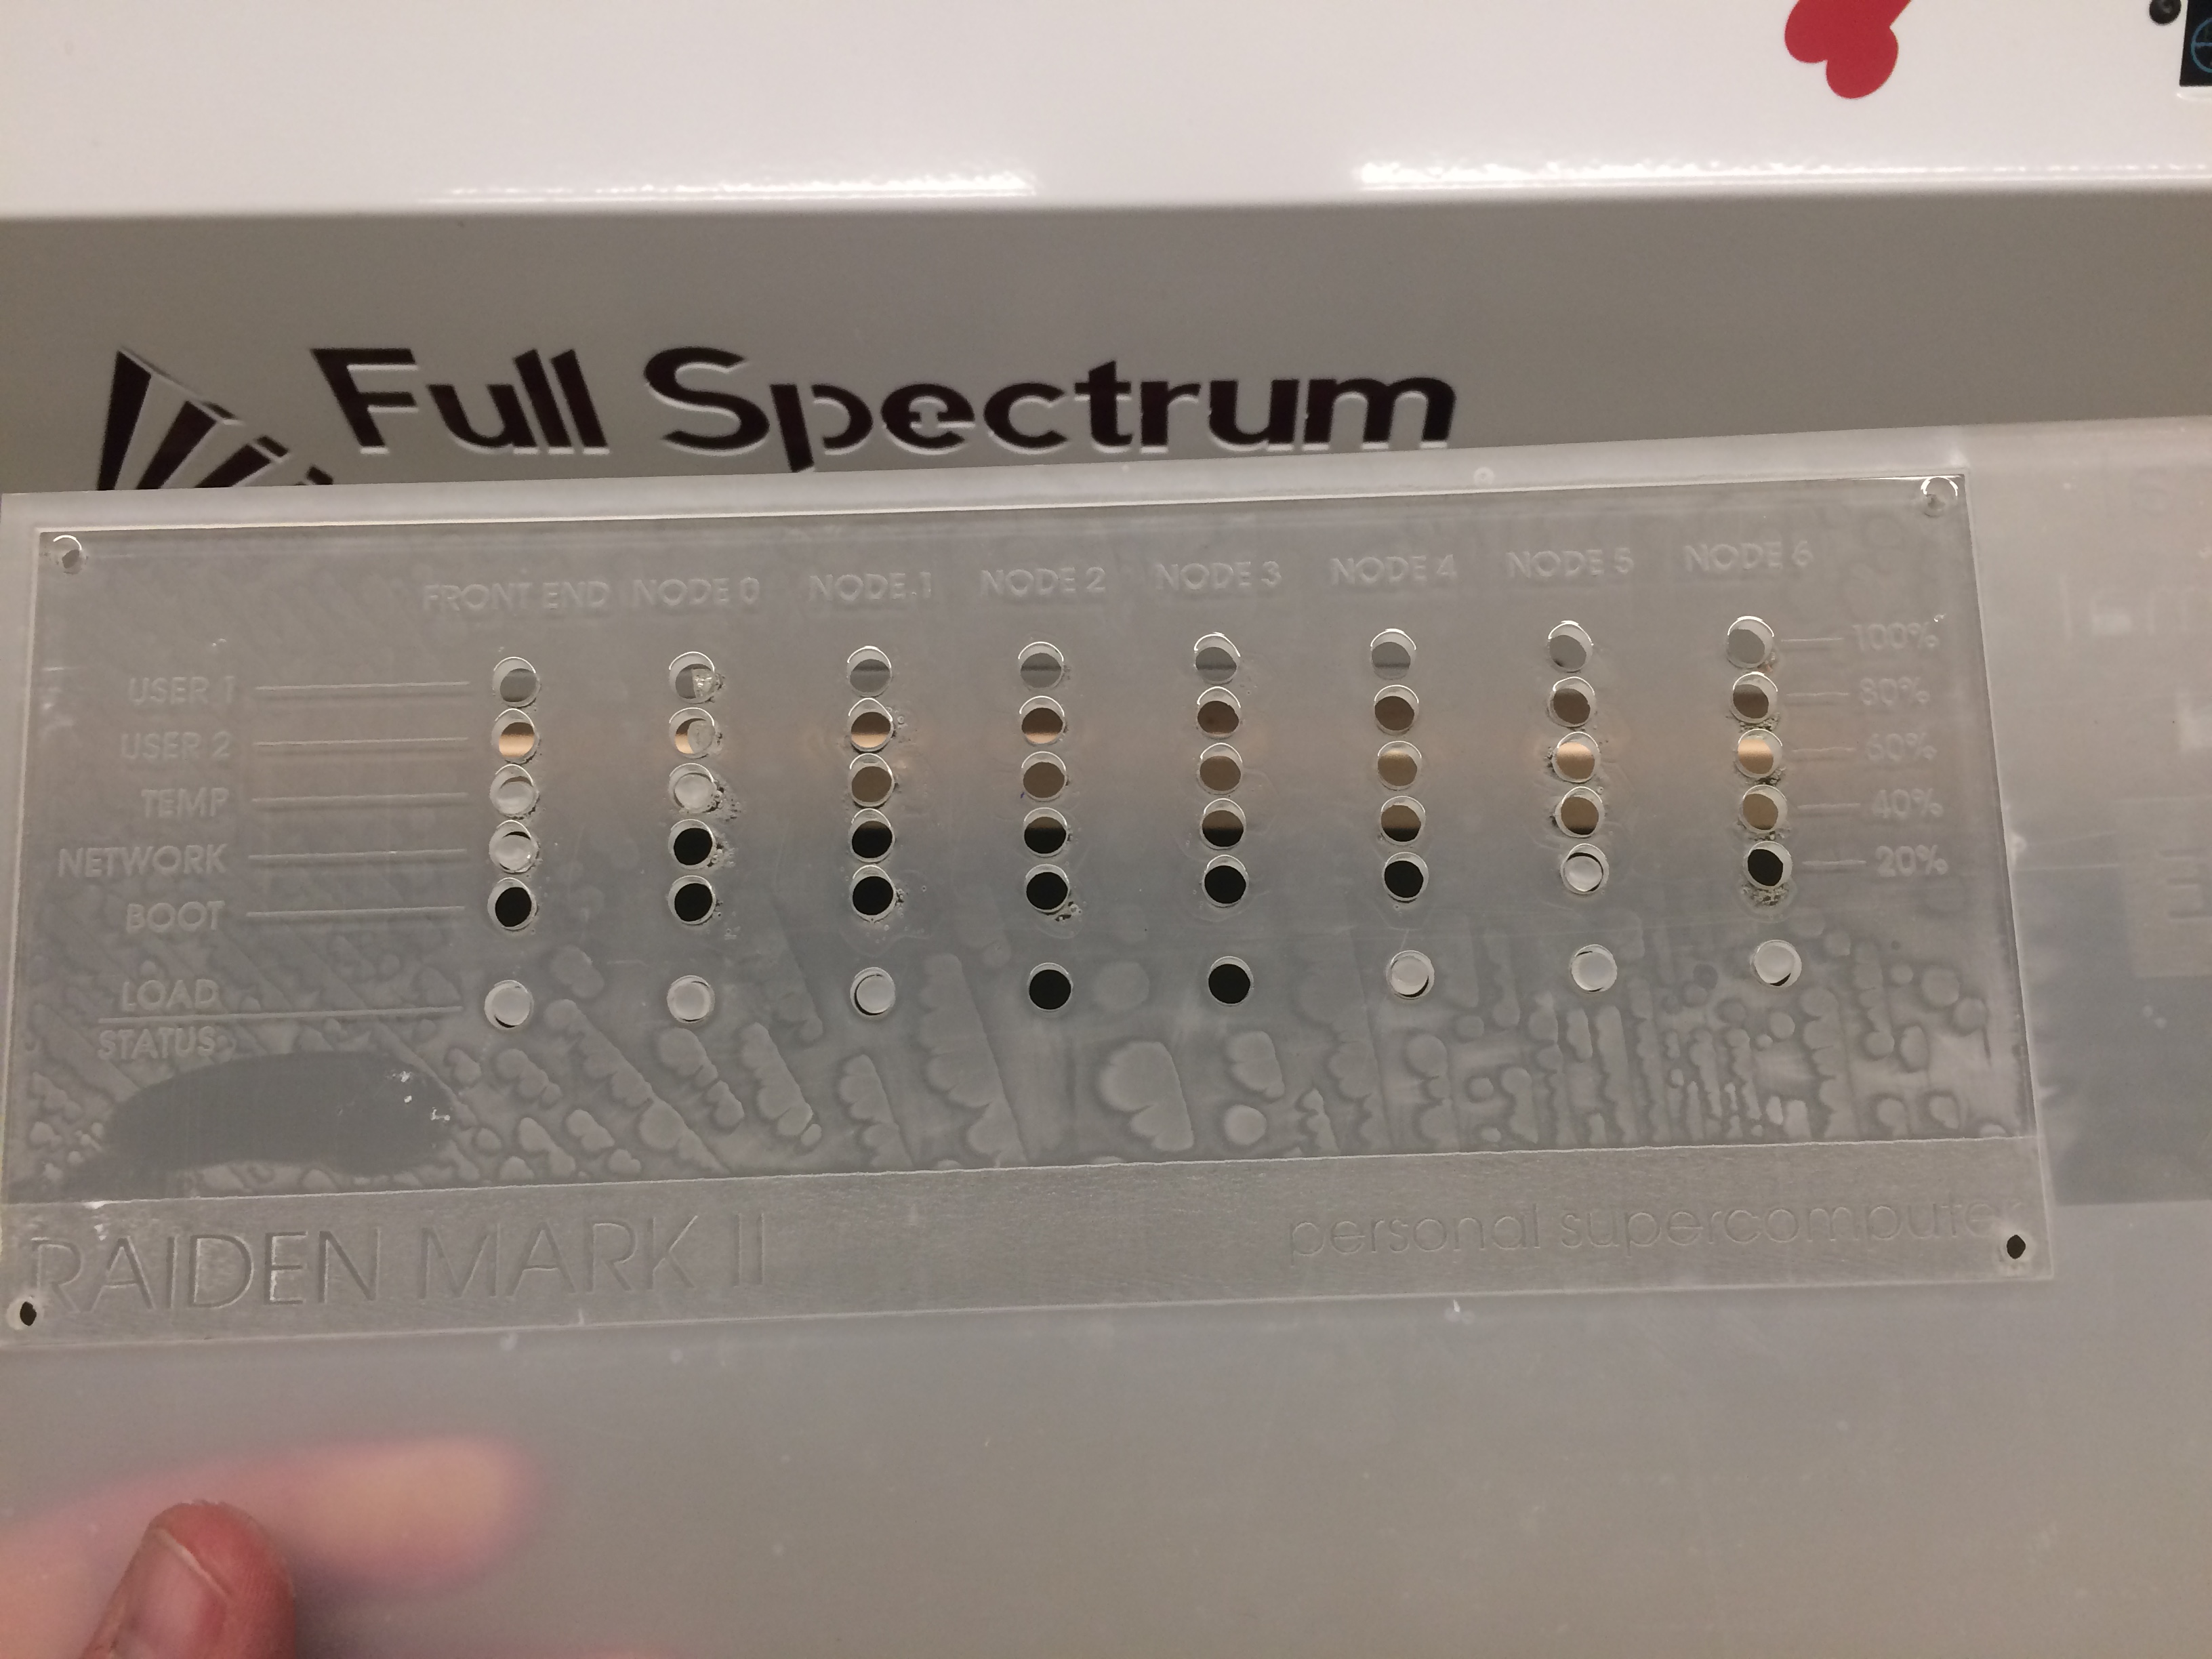 The test panel came out pretty good. I learned that my drawing had some errors in it which resulted in doubling the number of passes when cutting-out the LED holes. I also noticed that the laser was liquefying the “plugs” left after cutting the holes. On top of that, because I left the film on the back of the sheet, these liquid plugs were being suspended (instead of falling out the bottom) and getting stuck to the inside of the holes. Not great. I fixed these errors in the updated drawing and set the laser loose on the uncut portion of the acrylic sheet. This time the results were better, but even with the drawing corrected, 10 passes was still overkill (especially with the protective film removed). I also noticed that the plastic around the hole was getting soft, either due to excess cutting passes or maybe because I still had the protective sheet on the back and it was conducting heat. Either way, I’ll remove all the film next time. Just for fun I populated the panel to see how it looks (these parts will actually be mounted to the 3d printed compute modules). I’m pretty happy with how it’s turning out, even Jamie thought it looked good.
 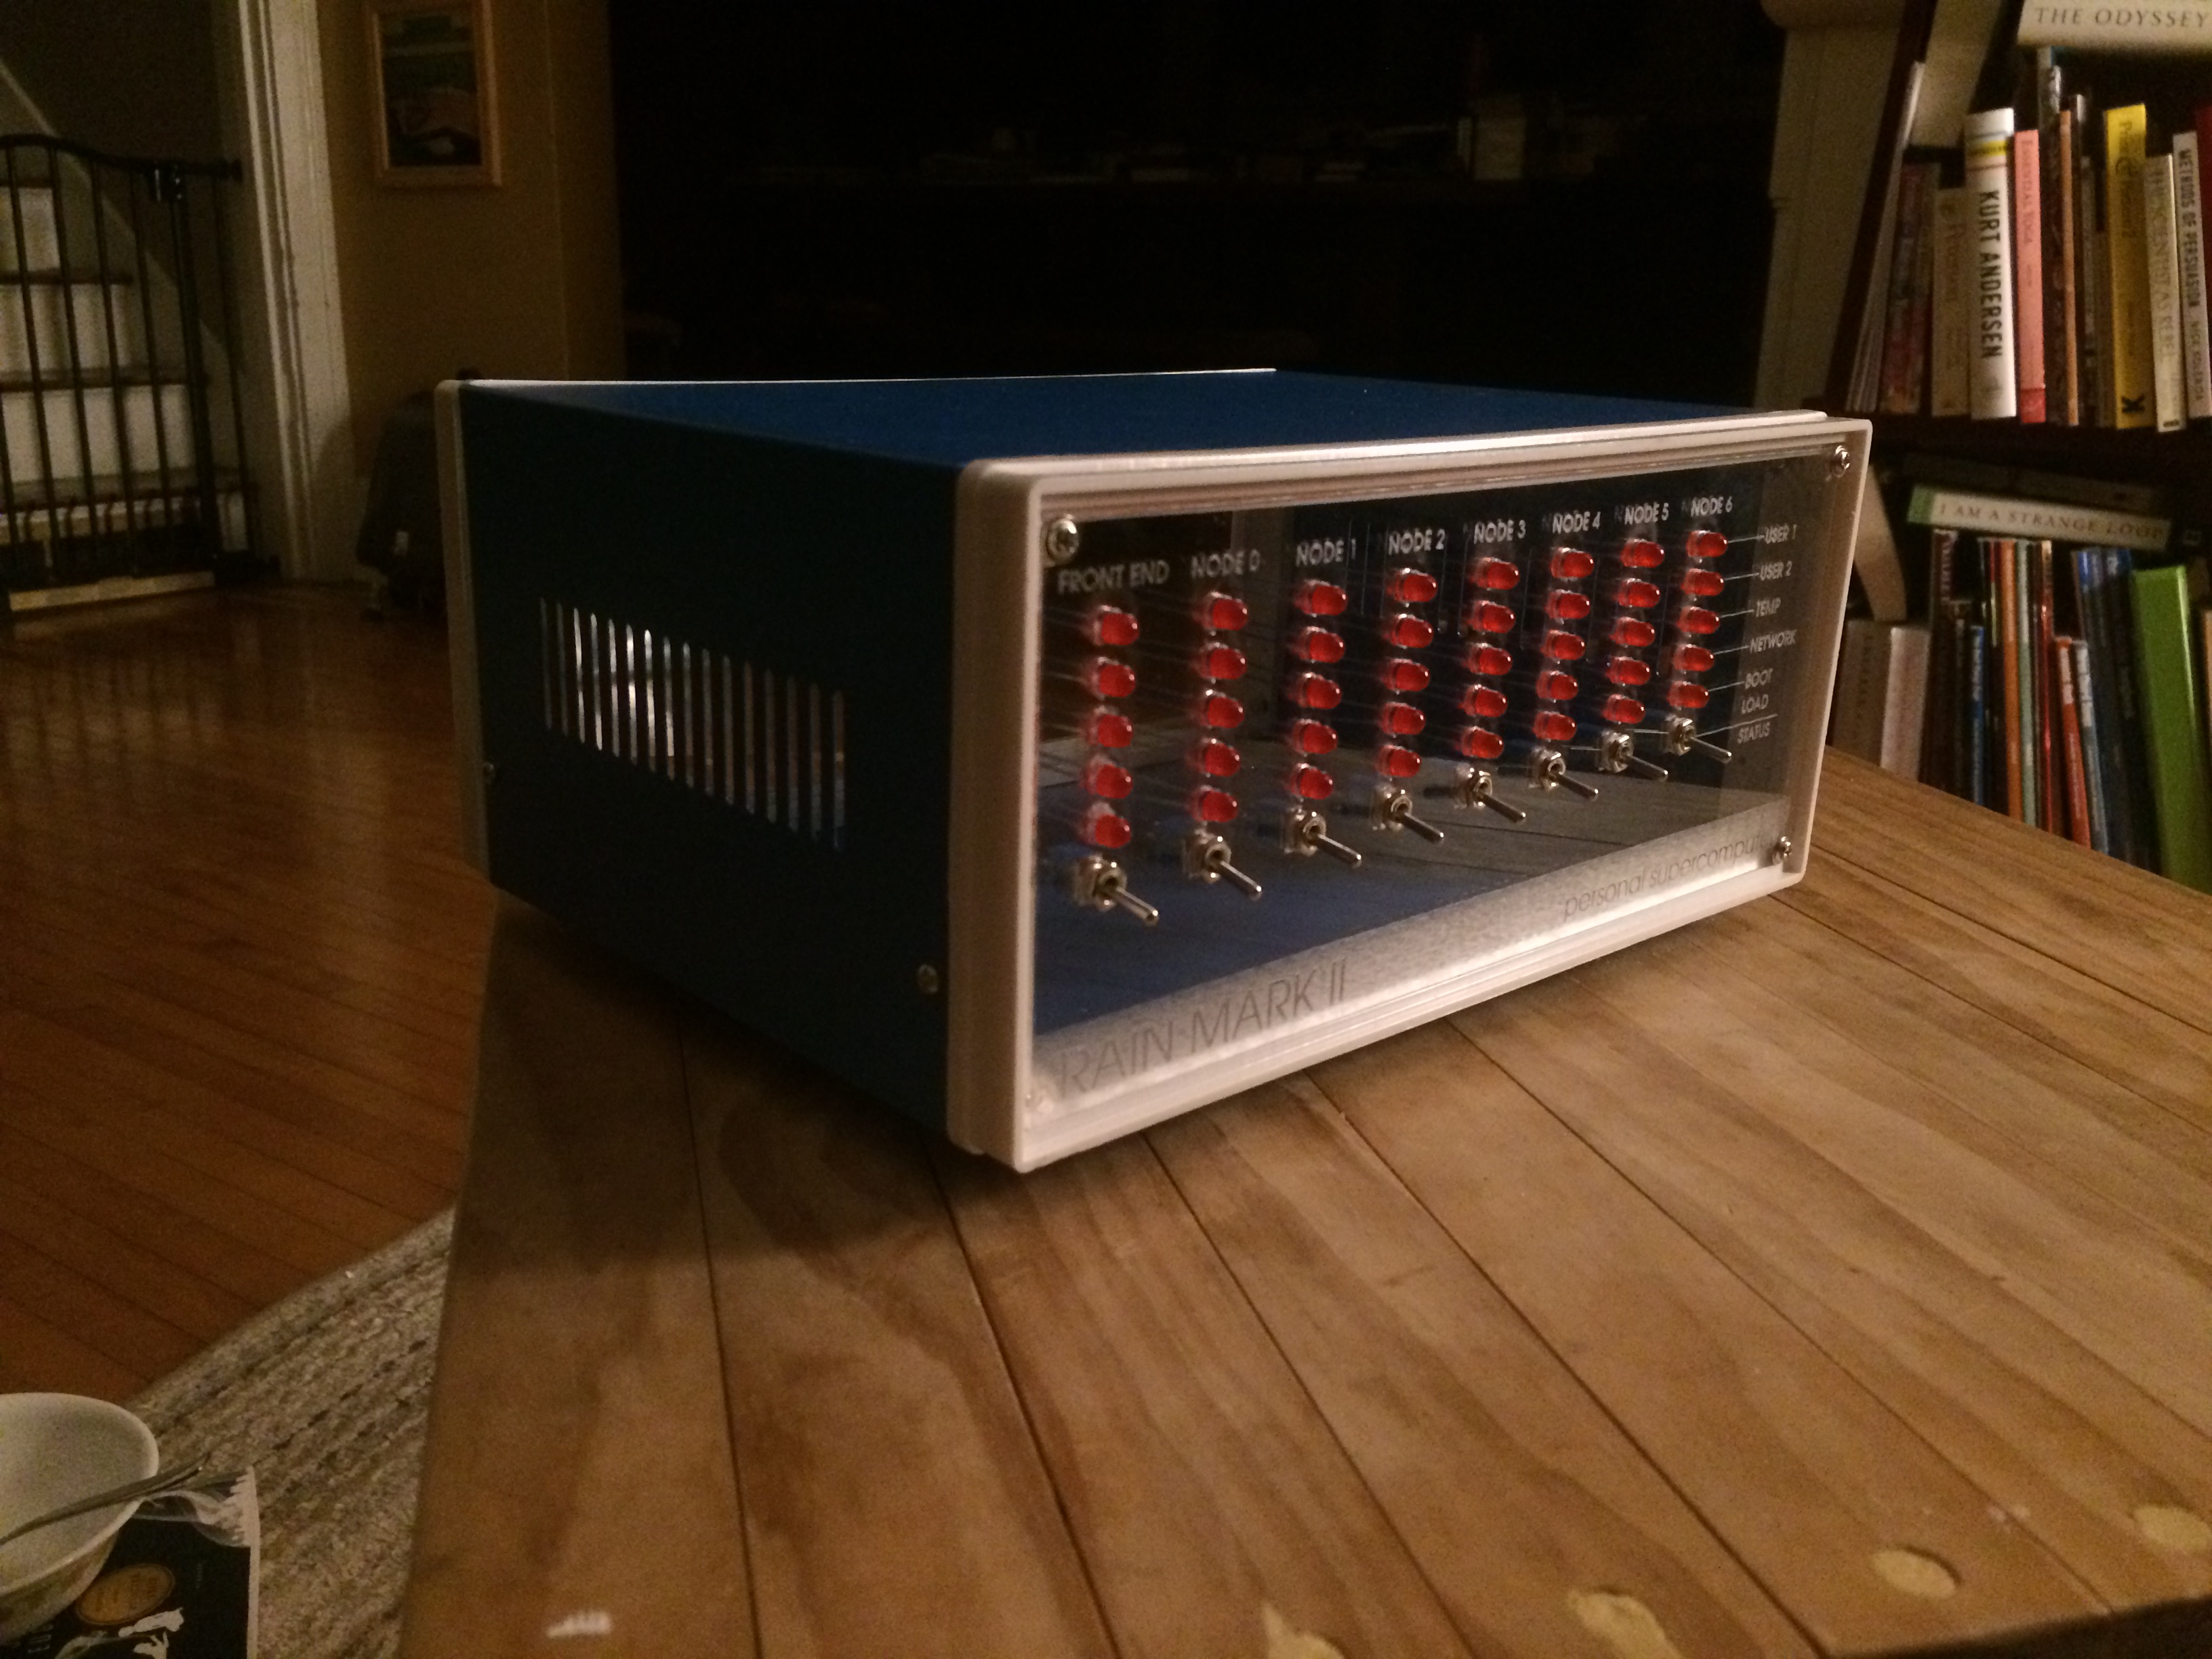 However, this revealed that the thickness of the panel creates a few problems. First is that the mounting screws that came with the case are too short. This is easily addressed with longer screws, but the bigger problem is that the combined thickness of the compute module faces and panel is too thick for the controls to work properly. For this reason (and a number of others) I’m going to have to make some more adjustments to the printed parts. Once I’ve got the printed parts dialed-in I’ll plan another trip to the Idea Studio to cut an updated version of the panel. Minimally there will be changes to accommodate mounting hardware for the modules and I’d also like to try some new aesthetic techniques for engraving the legends. I also need to design and cut a back panel… I had a great time working with the laser. This is definitely a tool I’d eventually like to add to my lab, but for now I’m very fortunate to have access to one thanks to the Idea Studio. If you are in the region I highly recommend you take advantage of it.
Comments
Shane: Hi Jason, No problem- everybody starts of green! I am fortunate to have had two formal classes in LASER theory as part of my Electrical Engineering degree way back when, and had access to the High Power LASER laboratory at New Mexico State University, through friend who were engaged in post graduate study and research. That experience gave me some rather unique insight into seriously high power lasers. I, as you, have attended a local maker space where I was fortunate to use a large LASER cutter to make some precise pieces from wood for a rocket project, and watched some local experts tuning the laser to make some plexiglass parts for others. The comments I provided to you were from the experts helping with those plexiglass parts. I’m enjoying following your personal cluster computer and look for to reading your future blog entries!
Jason J. Gullickson: This is very helpful, thanks Shane! I’m super green when it comes to laser cutting so any feedback on how to improve the process is appreciated :)
Shane: The LASER cutter is running at a much higher power than is needed to cut plexiglass. This is why you are experiencing melting around the holes, and the oozing of the cut-out material. Try a power level of 10-20% and only a single pass and see if you are getting clean cuts. The whole idea of the laser is to put in just enough power to VAPORIZE the plastic, you wish to be removed, but not so much that the resulting workpiece absorbs excess heat that melts the finished product. This is a balance of power and speed of cut. I recommend you experiment on a waste piece of plexiglass to ascertain how much power is needed to penetrate the plexiglass all the way through, and how long it takes to do so (called dwell time). Some laser cutters have control software that has a database of common materials and what parameters to use to get a good cut. Try to use the lowest power necessary to cut the piece through cleanly at the highest speed to keep the surrounding workpiece from absorbing heat and starting to melt/distort. Remember that materials can reflect, refract and disperse that laser light. A clean cut without melting minimizes reflection, refraction, and diffusing that laser energy, which means the beam does not stray far from the intended path specified, making for a cleaner cut and better looking result. Another aspect to keep in mind is that the laser beam is focused at the platen upon which the workpiece is resting, and there is a certain depth of focus, which should be taken into account if you cut thicker pieces of plexiglass/lucite. Best of luck with your project!