

Last time I gave a little background about why I chose a Chromebook 11 to replace my Macbook Air development machine. In this installment I’ll dive into slightly more technical waters and discuss how some of the limitations such a modest machine can be addressed.
Storage
My original post notes that the only limitation of the Chromebook’s hardware that concerned me was the 16GB of internal file storage. If you are using the device under Chrome OS exclusively I don’t think this will ever be a problem, but since we’re running a full-blown Linux installation alongside Chrome OS it was something that concerned me. Fortunately this is easily addressed thanks to Crouton’s flexibility and the availability of tiny, cheap USB flash drives.
Sandisk Cruzer Fit
Nobody wants a big dongle sticking out of the side of their laptop, and it’s also likely to eventually cost you a USB port (when you inevitably catch it on something and snap it off), so I knew if I was going to make a USB flash drive part of the Chromebook’s regular config, it would have to be something as low- profile as possible. The Cruizer Fit was the smallest I could find, and coincidentally, it’s inexpensive as well.

Like most flash drives this one comes formatted, but if you’re going to use it to run your chroot environment, it needs to be formatted with a filesystem that can preserve the chroot’s permissions (this should be obvious but I found it out the hard ware regardless). Unfortunately the Chrome OS GUI doesn’t provide a way to do this but it’s pretty easy to do from the command line.
_BFW - this could ruin your day, proceed with caution _
open a terminal (ctrl-alt + t)
type “shell”
type “ls /dev/sd*”
and note the files returned insert the USB flash drive and repeat the command above, noting the additional device files (something like “/dev/sda” or “/dev/sdb”)
unmount the flash drive (easiest way is to eject it using the “Files” app)
type “sudo fdisk
” where is the flash drive device, then press type “p”
to list the existing partitions type “d
” to delete each partition in turn (do this for each partition listed in the previous step) type “n”
to create a new partition press
about 4 more times, accepting the defaults (unless you know what you’re doing) type “w”
to save the changes to the partition back in the shell, type “sudo mkfs.ext3 -L
1” to create a filesystem on the new partition (this may take awhile) remove the flash drive and re-insert it
Chrome OS should automatically mount the drive and pop-up the “Files” app. If you see a USB drive with the name you chose in step 12 above, you’re ready for the next step.
You may want to create a directory on the flash drive to store your chroots (as opposed to just dumping them in the root of the flash drive, but hey, no judgement here). Since this filesystem understands Unix permissions, you can’t use the “Files” app to do this because your regular user doesn’t have permission to modify the flash drives filesystem. How I dealt with this was by creating my chroots directory from the shell as such:
sudo mkdir /media/removable/usb32/chroots
I also created a directory called “files” and modified the permissions so I could put stuff in there using the Files app:
sudo mkdir /media/removable/usb32/files
sudo chown chronos /media/removable/usb32/files
sudo chgrp chronos /media/removable/usb32/files
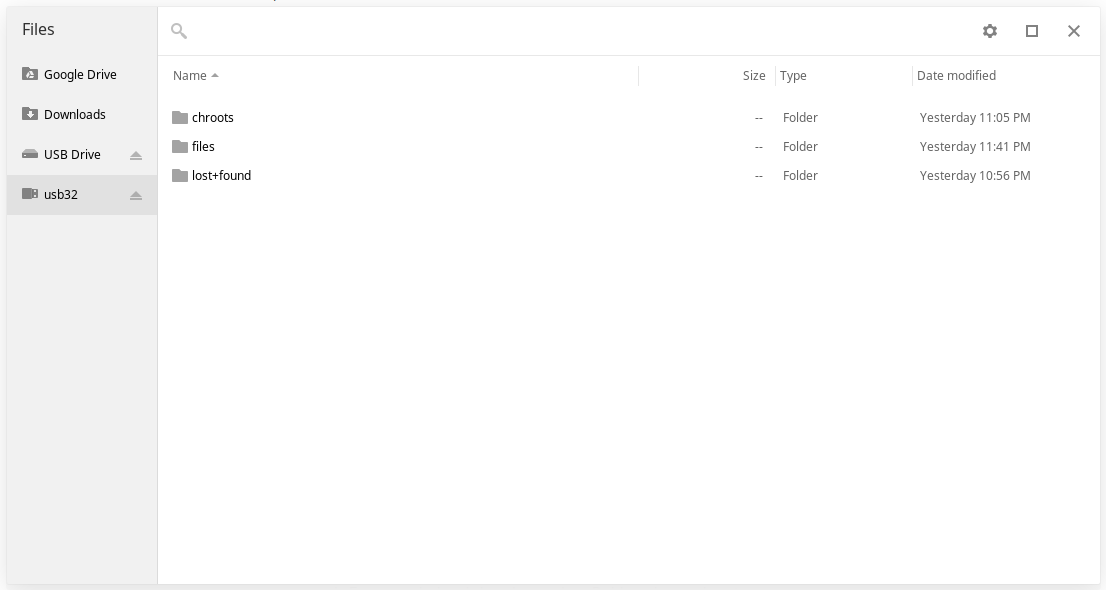
If you’re not seeing something like the screenshot above, review the steps above and Google any errors you encountered. It’s important that this goes as expected otherwise the next steps may not work correctly
Moving the Chroot
Here again Crouton has anticipated our needs and provides the edit-chroot utility making it easy to move the entire chroot environment with one command. For example, here’s how I moved my Debian wheezy chroot:
sudo edit-chroot -m /media/removable/usb32/chroots /usr/local/chroots/wheezy
Once moved you’ll need to tell Crouton where to find your chroot in order to start it, which is just a small change from before
sudo enter-chroot -c /media/removable/usb32/chroots
I noticed it takes awhile to start the chroot after moving it to the flash drive, but once running performance seems very similar to running from internal storage.
It’s worth noting that even though the chroot is now stored externally, internal storage can still be impacted by chroot activity. In particular the system’s temp directory will still be stored on the internal flash drive (maybe you can move this, but I haven’t figured it out yet) so things like apt-get can end up using a lot of internal storage while they’re working. This may be worked-around by using individual apt-get commands to install components (allowing the temp files to be cleaned out between runs) but I haven’t tested this yet. If I was really good with apt-get I might know of a way to redirect these temporary files, perhaps that will be a future post.
Side effects
There’s another advantage to moving the chroot on to USB storage. When stored internally, there’s no way (that I’ve found yet) for Chrome OS apps to access the files in the chroot directly. However, once stored on USB, the file open dialog can browse into the contents of the flash drive where the chroot is now stored and access (and modify) these files.
This opens up what can be done from Chrome OS significantly. For example, with the chroot stored internally I couldn’t use the excellent Chrome OS editor Caret to edit my code, because it was checked-out inside the chroot environment using Git, and running there under node.js. Since the “open file” dialog doesn’t display the root level of the Chromebook’s internal storage, there was no way to browse to these files. This necessitated running a full X environment in order to edit and test code*.
However, with the chroot on a USB drive, Caret can now browse to and edit these files, which means the other Linux tools I need (Git and Node.js) can be run in console “tabs” under Chrome OS, so there’s no need to run X to use a Linux-based editor.
This means that most of the time I can do everything I need to do right inside of the Chrome OS UI, which is very convenient and also more efficient; win- win.
Next time I’ll talk more in detail about setting up specific development environments and some of the Chrome OS apps that have worked well for me.
*Yes I could use a terminal-based editor in a Chrome terminal tab, but the font size makes it a little cramped, and there are other reasons a GUI editor can be nice :)