

ATtiny Microcontrollers (and how bigger isn’t always better)
I spent a little time today learning how to program the ATtiny13 microcontroller. I’m not sure how I ended up with a few of these chips (the ATtiny85 seems more popular), but they’ve been in my parts bin for awhile and I’ve never gotten around to playing with them until today. The first thing you notice about the Attiny is that it is, tiny. It’s an entire computer in an 8-pin package. [caption id=“attachment_795” align=“aligncenter” width=“475”]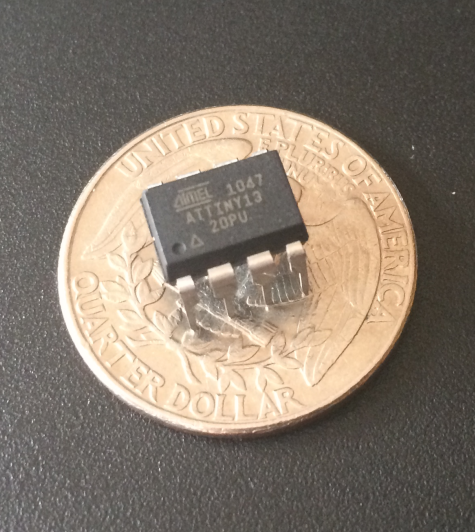 Is that not the cutest little computer you ever saw?[/caption] If you’re not familiar with the AVR microcontrollers you might know them better as the heart and brain of the Arduino (or at least, the original Arduinos). Feature-wise they are very similar to the larger chips used to power the Arduino, but with fewer I/O pins, less memory, etc. That said they are still amazingly capable devices which require very little (if any) additional circuitry to be useful. They are also very inexpensive, available for $3 a piece in a pack of 5 (or cheaper if you look hard enough). That’s a lot of computer (as the 176-page datasheet can attest) for the cost of a cup of coffee.
Hardware
You can use the Arduino IDE to write software these chips, but you’ll need some additional hardware to connect them to your computer for programming. I’m using a USBtinyISP I purchased from Adafrit many years ago, but you can use an Arduino board as well, if that’s easier to get ahold of. There are also dedicated ATtiny programmers for these chips if you don’t already have one of the other devices handy, which might be the way to go if you have to buy something anyway (they look cool but I haven’t tried one myself). 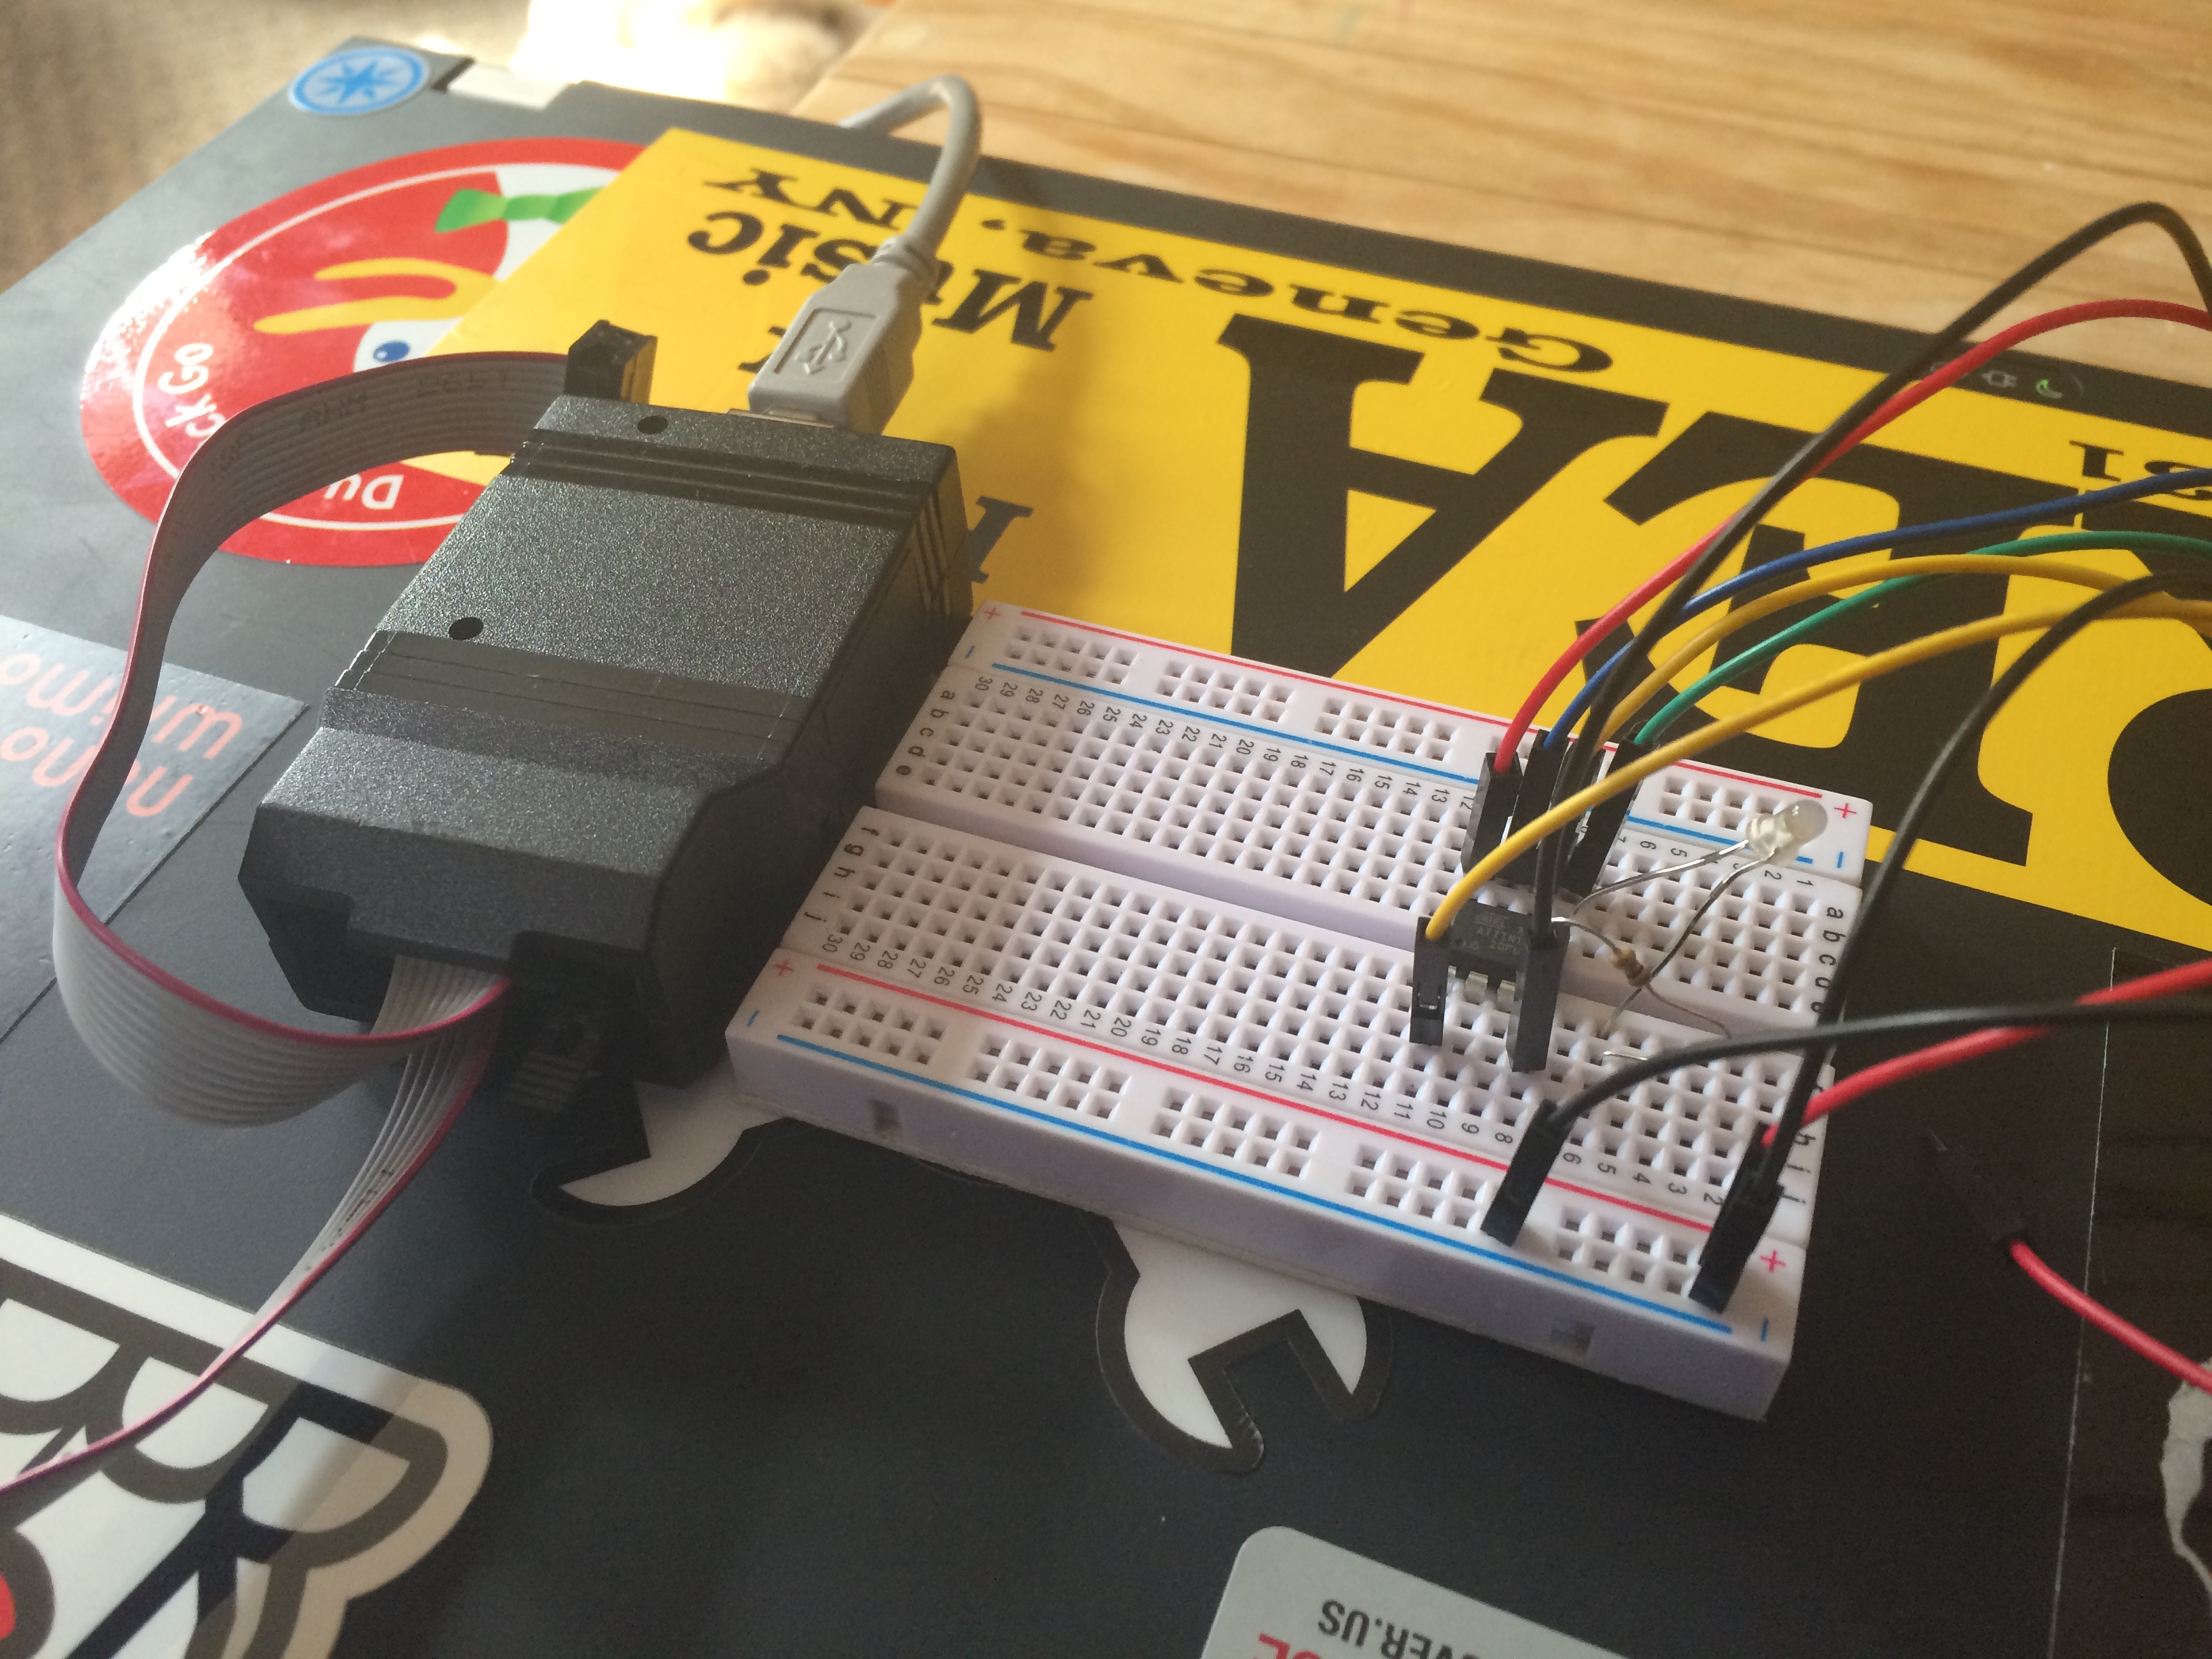 It was unusually difficult (for an Adafruit product) to find documentation of the pin-out of the USBtinyISP programmer’s cables (this is probably because they are standard and most people who use them regularly have memorized it). After a little searching I was able to find a diagram in the Adafruit forums and with some experimentation, came up with this pinout for the six-pin connector: Holding the connector with the cable’s red-wire up, looking into the pin holes: [code lang=text] |————-| | VTG | MISO | | MOSI | SCK | | GND | RST | |————-| [/code] These are then connected to the ATtiny13 as such:
USBtinyISP ATtiny13 (physical pin) ATtiny13 (logical)
VTG 8 VCC
MOSI 5 MOSI (PB0)
GND 4 GND
MISO 6 MISO (PB1)
SCK 7 SCK (PB2)
RST
1
RESET (PB5)
You’ll need a way to see if the code is actually working, so attach an LED between physical pin 5 (PB0) and 4 (GND). You should include a resistor in series as well the exact value will depend on your LED (I used a 1k ohm resistor which seemed to do the trick).
Software
As mentioned above you can use the Arduino IDE to write code for these chips but you’ll need to add support for the specific model you’re working with. If you chose the ATtiny85 linked above you’ll need to add the following Boards Manager URL: https://raw.githubusercontent.com/damellis/attiny/ide-1.6.x-boards-manager/package_damellis_attiny_index.json In my case I had some ATtiny13’s in my parts bin so I used this URL: https://mcudude.github.io/MicroCore/package_MCUdude_MicroCore_index.json In either case once you add the URL you can go into the Arduino IDE Boards Manager, search for “attiny” and you should see an option pop-up in the search results that matches the chip you selected. Select this result and click “install”. Now that the IDE knows your chip exists, you need to select it. Under the Tools -> Board menu select a board that matches the chip you’re using. Depending on the “board” selected there may be additional options added to the Tools menu that you need to use to refine the selection to the specific chip you’re using. For example, if you choose the ATtiny24/44/84 option, a menu will be displayed where you can select the specific CPU you’re targeting. There may be other options as well, but if you don’t know what they are I suggest leaving them at the defaults (when in doubt, consult the documentation for your chip). Now you’re ready to compile some code. I recommend starting with the basics and loading the “Fade” sketch from the File > Examples > Basics menu. This will let you test-out the compile and upload process to make sure things are working before you start writing any complicated code. You’ll need to modify the example sketch in order for it to work properly with the bare ATtiny. I changed the led variable to 0 (physical pin 5 on the ATtiny13) and I changed the fadeAmount to 50 to make the effect more obvious. I suggest running the compile step only until you get a clean result, no need to add complexity by trying to upload the code as well. Once you get the code to compile cleanly, you’re ready to try uploading the sketch to the chip. Before clicking “compile”, make sure you have the right programmer selected under the Tools menu. In my case this was simply a matter of selecting “USBtinyISP” from the menu (although I had to go through a couple of extra steps to get the Unix permissions right), but if you’re using an Arduino to program the ATtiny you’ll need to make sure the right sketch is loaded to the Arduino and then select ArduinoISP from the Tools > Programmer menu. With all this in place you’re ready to cross your fingers and click the “Upload” button. With any luck happy messages will appear in the Arduino IDE console and in a few seconds the LED will begin to fade on and off! http://www.youtube.com/watch?v=qQJW_q7wYB8
What’s Next?
Working with the ATtiny gets me thinking about how little attention we pay to the power of the technology we have at our disposal. It’s easy to justify spending a little more money to get the same results with less work. You could skip buying a programmer and use an Arduino instead. Once you go that far, you could spend a few more (or less) dollars and get a full-blown Linux computer. So why bother with the ATtiny? I’m of the mindset that if you can make something cool, what you make it out of is less important. If you want to use a desktop computer to blink an LED, that’s better than spending your time watching TV. What I’m getting at is that I think the accessibility of these technologies can result in something of a “lack of appreciation” by designers, developers, etc. of what these devices are capable of. As such, we tend to apply the consumer mentality of selecting the device that “owns the market” in terms of performance, cost, etc. when we chose the parts we want to work with.